
Pro Guide: How to Install a Car Stereo
- Installing a car stereo can be tricky for those who don’t know much about automotive electronics. But, with a few simple steps you can make your vehicle’s audio system awesome! Here’s how to do it like a pro:
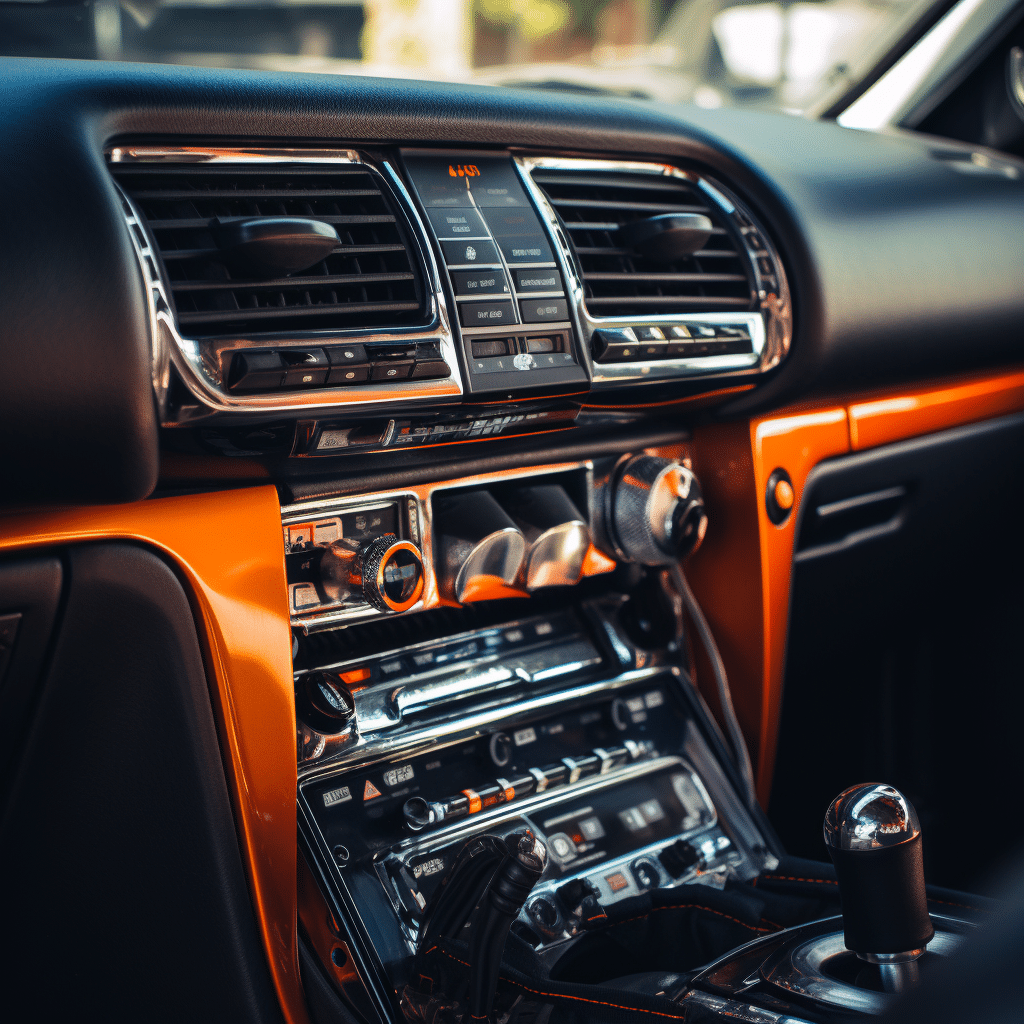
- First, get the right tools and parts. You’ll need a compatible stereo, wire harness adapters specific to your car, an antenna adapter (if needed), wire connectors, electrical tape, and panel removal tools.
- Second, disconnect the vehicle’s battery before wiring. This is important to avoid short circuits or damage to components. After that, carefully remove any trim panels or dash pieces blocking the factory radio.
- Third, take note of the factory radio’s wiring. You may want to take pictures or make diagrams for reference. Then, disconnect the cables and antenna from the back of the radio.
- Fourth, connect the wire harness adapters to the aftermarket stereo and the vehicle’s wiring harnesses. Matching colors will make this step easier. Secure each connection with wire connectors and tape them up.
- Fifth, slide the new car stereo into the dashboard slot. Make sure it fits without forcing anything or damaging trim pieces. Reattach the removed trim panels or dash parts.
- Pro Tip: Before the installation is done, double-check all connections for accuracy and secureness. This will save you from issues down the line.
- Now you know how to install a car stereo. Take your time and follow the instructions that came with your stereo. Enjoy the sweet sound of your music on the road!
Tools and materials needed
Installing a car stereo requires the right tools and materials. Here’s what you need:
- Wiring harness: A plug-and-play solution that connects the new stereo to your vehicle’s electrical system.
- Dash kit: To make the new stereo fit perfectly into your car’s dashboard.
- Screwdriver set: Different sizes for removing the old stereo and installing the new one.
- Wire crimpers: For making strong connections between wires.
- Panel removal tool: For safely removing panels without damaging them.
- Electrical tape: To insulate and secure wire connections.
Make sure the tools and materials are compatible with your car make and model.
Car stereo installations have come a long way. In the past, people had to manually connect wires and modify dashboards. Now, wiring harnesses and dash kits make installation easier with minimal modifications. Innovation has definitely improved our lives!
Step 1: Preparation
To install a car stereo, take these steps:
- Disconnect the negative cable from the car battery for safety.
- Gather tools like wire strippers, crimpers, and a trim removal tool.
- Read the instruction manual thoroughly to know the wiring and mounting needs.
- Take out any components that may block the installation.
- Check the wiring harness and antenna adapter are compatible with the new car stereo.
- Organize tools and materials in a well-lit area for convenience.
Remember: each car model may have its own specific preparation needs. It’s essential to properly prepare before installing a car stereo.
Step 2: Removing the old stereo
Time to install a new car stereo? Let’s start by removing the old one! Here’s a helpful guide:
- Disconnect the negative battery terminal. Safety first!
- Pry off the trim panel with a tool or screwdriver. Do it carefully.
- Unscrew and remove the old stereo. Use a screwdriver or socket wrench.
- Disconnect the wiring harnesses and antenna. Refer to the car manual.
Voila! Now you’ve removed the old stereo.
A few more things: Different car models may have variations in their installation processes. Check the car manual or get professional help if needed.
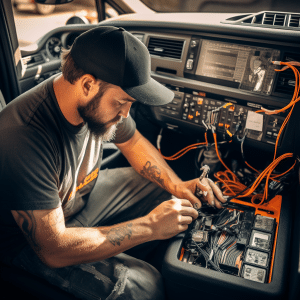
Step 3: Wiring the new stereo
Wiring a new car stereo is vital. The right wiring ensures it functions well and sounds great.
- Identify the harness: Find the one that fits your car’s make and model. This will link the new stereo with the car’s systems.
- Connect wires: Match up the colored wires from the harness to the stereo’s. Take off a small part of the insulation and twist them together. Cover metal parts with electrical tape or crimp connectors.
- Ground wire: Look for a ground point close to the new stereo. Clean paint or debris, then attach one end of the wire to it with a screw or bolt.
- Power wires: Find two power wires on the car’s harness – a constant and a switched one. These provide power for different stereo features, like memory and turning off with the ignition. Connect these securely on both ends.
- Test connections: Before assembling the dashboard, turn on the stereo and check the radio, speakers and display.
Remember to use your car’s wiring diagram and user manual for instructions that fit your vehicle.
Safety first! To avoid shocks or damage, disconnect the negative terminal of the battery before wiring the new stereo.
Pro Tip: For audio connections between the stereo and other components, use shielded cables to block noise interference.
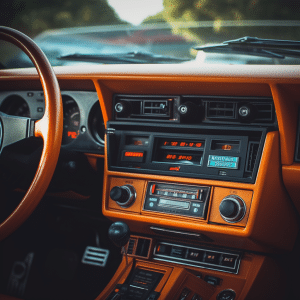
Step 4: Mounting the new stereo
Sarah wanted a new car stereo with fancy features! So, she followed 4 steps for a successful installation.
- Step 1: Attach a mounting bracket to the stereo with screws or clips. Match components to her car model.
- Step 2: Remove the old stereo and disconnect all wiring. Keep track of which wires go where.
- Step 3: Connect the color-coded wires from the new stereo. Use crimp connectors or solder for a secure connection.
- Step 4: Securely mount the new stereo. Double-check all connections before replacing any panels.
If difficulties arise, consult the car manual or seek a pro for help.
Sarah got her wish! After properly installing her new stereo, it blended into her car’s interior and connected with her smartphone without a hitch. Although it may seem tricky, anyone can install a car stereo with patience and accuracy.
Step 5: Testing and troubleshooting
- Time to test and troubleshoot your car stereo! Ignition on to check if it powers on correctly.
- Test each speaker separately.
- Listen to different types of audio for the sound quality.
- Check all controls and settings, like volume, bass, treble, and balance.
- Also test additional features such as Bluetooth and USB ports.
- Double-checking connections and troubleshooting now can prevent future issues.
- Enjoy the benefits of your new car stereo.
- Take action now for a high-quality audio experience!
Conclusion
When it comes to installing a car stereo, there are a few key points to remember. Firstly, make sure you have all the tools and equipment before starting. This will save time and hassle. Secondly, carefully read the instruction manual which comes with the new stereo. Each model may require different steps. These instructions must be followed to avoid damaging the car or the stereo.
Also, pay attention to the wiring. Connect each wire correctly and securely. Incorrect connections can cause the stereo to malfunction or damage the vehicle’s electrical system. If you are unsure, call a professional for help.
Once installation is complete, double-check all connections. Ensure everything is connected and secured to prevent audio disruptions. Lastly, test your new stereo. Turn it on and try out different functions such as radio, CD, USB, etc. Make sure they all work without any problems.
Frequently Asked Questions
Question 1: Can I install a car stereo myself?
Answer: Yes, you can install a car stereo yourself as long as you have basic knowledge of car electronics and the necessary tools.
Question 2: What tools do I need to install a car stereo?
Answer: The tools you may need include a screwdriver (flathead and Phillips), wire strippers, crimping tool, dash removal tool, and possibly a multimeter for testing electrical connections.
Question 3: Does installing a car stereo require any special wiring knowledge?
Answer: Basic wiring knowledge is helpful, but most car stereos come with color-coded wiring harnesses and instructions that make the installation process easier for beginners.
Question 4: How much time does it take to install a car stereo?
Answer: The time required for installation depends on your experience and the complexity of the car stereo system. On average, it may take anywhere from 1 to 3 hours.
Question 5: Can I use my existing car speakers with a new car stereo?
Answer: In most cases, you can use your existing car speakers with a new car stereo. However, compatibility should be checked based on your specific car model and the specifications of the stereo.
Question 6: Is it necessary to disconnect the car battery before installing a car stereo?
Answer: It is recommended to disconnect the car battery before installing a car stereo to prevent any electrical damage or short circuits during the installation process.