
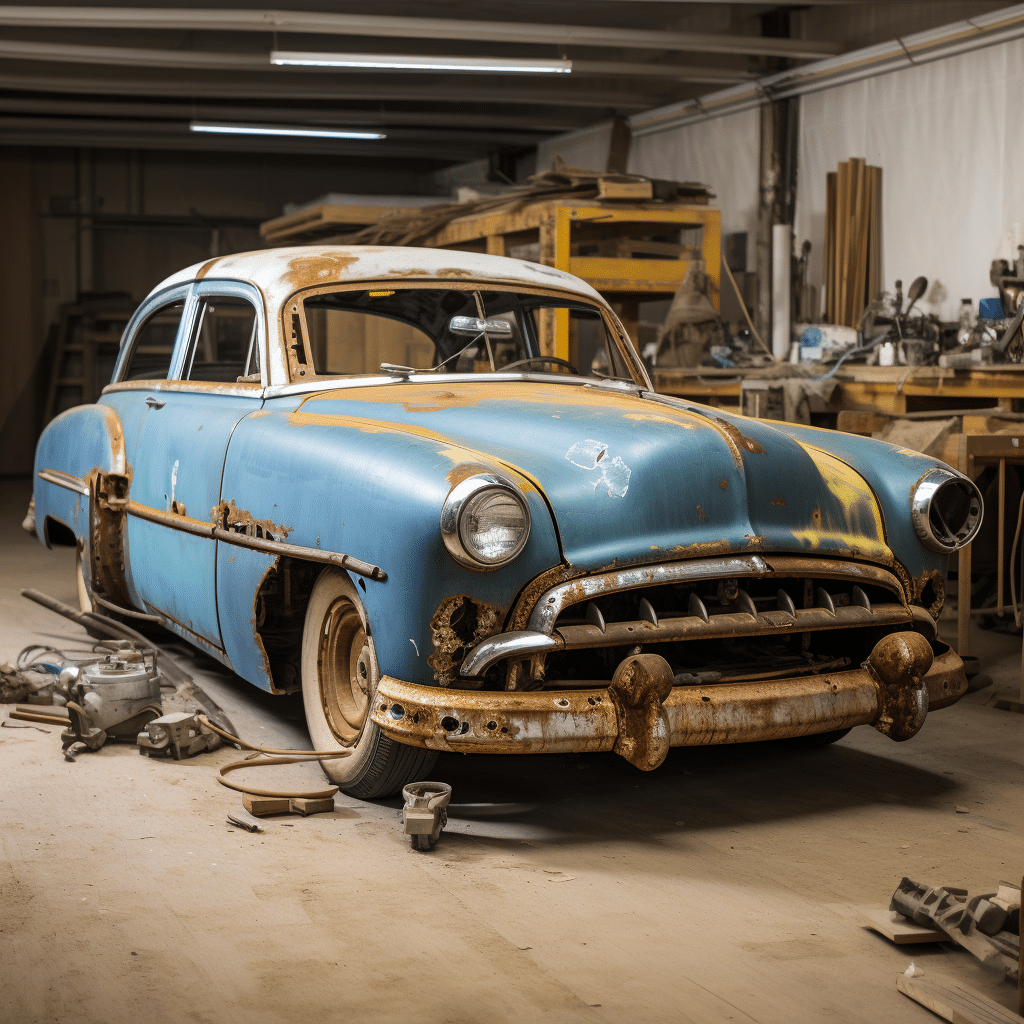
Mastering Car Restoration: Tips for Remarkable Projects
Starting a car restoration project can be thrilling! It’s an opportunity to bring automotive history back to life with your craftsmanship. But, plan carefully first. Here are some tips for planning a restoration project:
- Set goals. What kind of car? Specific model or era? This will help keep you focused.
- Create a plan. Assess the car and determine repairs. Research parts, tools, and resources needed. This will help you budget time and money.
- Find fellow enthusiasts. Collaborating offers support and expertise. Seek advice from experienced restorers or join online forums.
- Document the journey. Take photos before, during, and after each stage. Track progress and get inspired when faced with challenges.
Restoring a car is about preserving history and creating something remarkable. With dedication and attention to detail, it can be an amazing experience. So why wait? Start now and have a remarkable adventure that will last forever!
Research and Planning
Research and meticulous planning are crucial for any car restoration project to excel. It helps you gain insights and devise an effective strategy. A well-planned approach ensures you have the right resources, knowledge, and timeline. Let’s analyze the essential components that contribute to a successful restoration project.
Budget: Establish the financial aspect.
Vehicle Identification: Identify the make, model, and year.
Parts Availability: Research replacement parts for procurement.
Tools and Equipment: List necessary tools and set up workspace.
Documentation: Gather comprehensive documentation.
Unique details enhance the research. Explore online forums or join local car clubs for experienced advice. Create a detailed checklist to ensure no information is missed. This will lead to a more efficient planning and smoother restoration.
Setting Goals and Budget
Setting Objectives and Financial Plan
To ensure the success of your car restoration project, it is crucial to set clear objectives and establish a realistic financial plan. Here are five key points to consider:
- Identify Your Objectives: Clearly define what you want to achieve with your car restoration. Whether it is restoring it to its original condition or customizing it to your preferences, having a clear goal will guide your decision-making process.
- Assess Resources and Budget: Evaluate the resources you have available, including time, skills, and finances. By setting a budget, you can allocate funds appropriately and avoid overspending. Consider all aspects, such as purchasing parts, hiring professionals, and potential unexpected expenses.
- Prioritize Tasks: Once you have defined your objectives and allocated a budget, prioritize the tasks involved in the restoration process. Determine which tasks are essential and those that can be done later. This will help you stay organized and focused throughout the project.
- Research and Gather Information: Before starting the restoration, conduct thorough research on the specific car model, parts availability, and restoration techniques. This knowledge will enable you to make informed decisions and ensure the authenticity of your restoration.
- Monitor Progress and Adapt: Regularly monitor the progress of your car restoration project. Keep track of expenses, time spent, and the achieved milestones. If necessary, adjust your objectives or budget to accommodate any unforeseen challenges.
Furthermore, it is crucial to keep in mind that effective communication and collaboration within your team, if you have one, are essential for a successful restoration project. By setting clear objectives and a proper financial plan, you can increase the chances of achieving a satisfying outcome and enjoying the process along the way.
Assessing the Condition of the Car: Remember, seeing a beat-up car is like looking at your ex’s selfie after a bad breakup – it’s painful, but it’s the first step to moving on and making it better.
Assessing the Condition of the Car
The young buyer longed for her first car, but failed to assess its condition properly. She discovered hidden mechanical issues, draining her bank account with costly repairs. This led to the reminder of the significance of evaluating a car before investing.
To help review the car’s condition, here’s a 5-step guide:
- Exterior Inspection: Check for dents, scratches, rust, tires, headlights and indicators.
- Interior Assessment: Review functionality of all controls and buttons. Inspect seats, carpets and roof lining for damages or stains.
- Mechanical Evaluation: Test drive the car to assess performance. Pay attention to engine noise, responsiveness and braking system.
- Documentation Review: Analyze service records to determine regular maintenance has been done. Check for previous accidents or major repairs.
- Professional Inspection: Hire a certified mechanic to examine engine, transmission, suspension, and electrical systems.
Also, don’t forget minor details like mileage, spare tire and tools in the trunk, and fluid levels. This way, you can make informed decisions when budgeting for a car purchase or maintenance.
Determining the Scope of the Restoration
Restoration projects need to have a clear understanding of what the scope should be before beginning. This involves looking into the extent and goals of the restoration.
- Figure out the areas that need fixing: Start by examining the areas that require restoration, be it a damaged building, a messed up ecosystem, or a historic item.
- Pinpoint the goals of restoration: Ascertain the result desired from the restoration project, such as getting it to its original state, improving the look, or preserving cultural heritage.
- Check what resources are available: Check the resources needed for the restoration, that includes money, items, and human power. This aids in setting realistic objectives and budget.
To improve the scope determination process, foresee any issues that may arise and make plans for them.
It is essential to remember that determining the scope is essential for project management success as it clarifies objectives and aids in efficient resource allocation.
The International Journal of Heritage Studies did a study and found that projects with properly defined scopes had higher success rates and were likely to be finished within budget and timeline limits.
By tackling restoration projects with a comprehensive knowledge of their scope, stakeholders can tackle issues effectively and attain desired goals.
Gathering Resources and Tools
To ensure a successful car restoration project, it is important to gather the right resources and tools before starting. Consider sourcing specialized tools like an engine hoist or a paint sprayer, as they can save time and effort.
The resources to include for your car restoration project are:
- Car manuals: These will provide guidance and instructions specific to your make and model.
- Replacement parts: Depending on the condition of your car, you may need various replacement parts to restore it.
- Paint and primer: Choose the appropriate paint and primer for your car’s exterior.
- Sandpaper: Different grits of sandpaper will be needed for sanding and smoothing surfaces.
- Socket set, wrenches, screwdrivers, and pliers: These tools will be necessary for working on different components of the car.
However, it’s important to be aware that the availability of classic car parts can differ greatly depending on the make and model. Keeping this in mind, plan ahead and research the availability of parts specific to your car before starting the restoration process.
Creating a Timeline
Creating a timeline for your car restoration project is super important for staying organized and on track. Break down the tasks into smaller steps and set realistic goals and deadlines with this step-by-step guide:
- Research & Planning: Gather info about the parts needed, reliable suppliers, and time required for each task.
- Breakdown Tasks: Disassemble, clean, repair, paint, reassemble – assign a timeframe for each.
- Prioritize: Determine what needs to be done first, considering dependencies.
- Set Deadlines: Assign deadlines based on priority and estimated time.
- Monitor Progress: Regularly review & update timeline. Track completed tasks and adjust if needed.
- Flexibility: Have a timeline, but remain flexible. Adapt to challenges and stay focused on the end goal.
Communication is key in successful project management – so stay in touch with suppliers and anyone else involved.
Patience is key! It may take longer than anticipated, so plan and have a cohesive timeline. J.A. Benjamin said, “A car restoration project is a labor of love that brings nostalgia back to life.”
Enjoy the process and watch your dream car take shape!
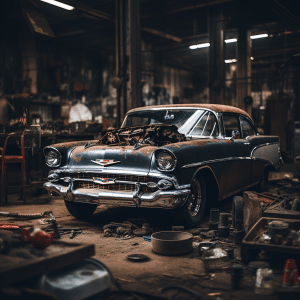
Disassembling the Car
Disassembling the vehicle is a crucial step in the car restoration process. This involves carefully taking apart the various parts and components of the car to prepare it for restoration.
Here’s a 3-step guide to disassembling the car:
- Start with the interior: Begin by removing the seats, carpeting, and trim pieces. Take accurate notes or photos to remember the original placements and connections.
- Move to the exterior: Remove the doors, hood, trunk lid, and other body panels. Label and organize the fasteners and hardware to ensure easy reassembly later.
- Tackle the mechanical components: Disconnect the engine, transmission, suspension, and other mechanical parts. Properly drain fluids and keep track of all the removed parts for inspection and restoration.
During disassembly, it is important to be mindful of hidden bolts or connections and use the appropriate tools for each task. Take note of any unique features or challenges that may arise during the process.
It’s crucial to handle this step with care and precision to avoid damaging any parts or losing important pieces. By following this guide, you’ll ensure a smooth disassembling process for your car restoration project.
Don’t miss out on the opportunity to thoroughly disassemble your car and get it ready for restoration. Start your project with confidence and enjoy the satisfaction of bringing a classic vehicle back to life.
Remember, organizing car parts is like playing Tetris, except instead of completing lines, you’re completing a masterpiece on wheels.
Documenting and Organizing Parts
When it comes to car disassembly, it’s key to document and organize the parts. This helps stop any parts from being forgotten or misplaced during reassembly. Here’s how:
- Create a table with columns like part name, location, condition and remarks. This makes it easy to reference and keep track of each part.
- Take clear photos of each part from different angles. This visual documentation comes in handy when reassembling.
- Label each part correctly, with tags or labels that show where it belongs or its function. That’ll help avoid confusion and save time.
- Double-check all necessary info is documented before moving on. This way, no parts will be missing or misplaced.
Follow these steps and accurately document each part. That way, you can confidently continue disassembling, knowing everything’s accounted for.
There’s no need to delay – start disassembling your car today and experience the advantages of an organized approach!
Removing Components
To dismantle the car, it’s essential to carefully take out its parts. This ensures safety and effectiveness!
Start with the inside: Take off the seats, carpet, and dash panels. Detach any electrical connections and ease the steering wheel off.
Move to the engine bay: Start by taking out the battery and disconnecting wires or hoses to the engine. Lift out the radiator, alternator, and other major components.
Focus on the transmission: Drain the transmission fluid and unfasten bolts or brackets to detach it from the engine.
Do the suspension and brakes: Unscrew struts, control arms, and brake calipers one-by-one. Disconnect any hoses or cables.
Concentrate on the exhaust system: Unfasten clamps or bolts holding each exhaust section together, starting at the back and working forwards.
Finally, wheels and tires: Use an appropriate wrench to undo the lug nuts and remove each wheel safely.
When disassembling, it’s vital to take it slow and be careful to keep away from damage to the components or harm to oneself. To aid this process: use the right tools for every part’s removal, refer to a car manual or online resources for direction, take pictures or make notes, and label small parts or store them separately. This guarantees a successful disassembly while keeping safety and efficiency during each stage of removing car components.
Evaluating and Restoring the Body
Evaluating and Restoring the Body of a car involves assessing the condition of the outer structure and performing necessary repairs and renovations. This process aims to enhance the appearance, functionality, and durability of the vehicle’s exterior.
To better understand the evaluation and restoration of the car’s body, let’s consider the following table:
| Aspect | Details | Importance |
|---|---|---|
| Exterior paint | Check for scratches, peeling, and fading | High |
| Rust and corrosion | Inspect for rust spots and signs of corrosion | Medium |
| Body panels | Assess the condition of the body panels and look for any dents or damage | High |
| Windshield and windows | Check for chips, cracks, and proper sealing | Medium |
| Trunk and doors | Examine the functionality and alignment of the trunk and doors | High |
During the evaluation process, it is important to pay attention to unique details such as hidden rust spots, obscure dents, or any previous repairs that may require special consideration. These details can significantly affect the overall restoration process and should not be overlooked.
To successfully restore the car’s body, consider the following suggestions:
- Prioritize addressing any mechanical issues before beginning the body restoration. This will ensure that the foundation of the vehicle is in good condition and prevent future complications.
- Use high-quality materials and tools during the restoration process. Investing in durable paints, primers, and rustproofing products will help maintain the body’s integrity for a longer period.
- Seek professional guidance and assistance if needed. Car restoration can be a complex task, and having the expertise of experienced restoration specialists can greatly enhance the outcome of your project.
By following these suggestions, you can restore the body of your car effectively and efficiently. Taking the time to evaluate and address any body-related issues will ultimately result in a visually appealing and reliable vehicle.
“Dealing with rust and corrosion is like trying to stop a leaky faucet with a Band-Aid, but hey, at least it keeps things interesting in the car restoration world.”
Addressing Rust and Corrosion
Rust and corrosion can cause huge damage. But, there are ways to fix it. 6 tips to help:
- Clean regularly. This stops moisture from building up and causing problems.
- Put a protective coating on – like paint or varnish – to create a shield.
- Use anti-rust sprays. These contain chemicals that stop rust from forming.
- Put in proper drainage systems. Stop water from getting to vulnerable areas.
- Use sacrificial anodes. These metal components protect other metals.
- Get professional help if it’s serious. Experts have the tools to restore it.
Plus, prevention is key. Inspections, maintenance, and noticing early signs will save you money.
To stop rust and corrosion, try these:
- Keep belongings in a dry place.
- Avoid chemicals.
- Put desiccants or absorbers near susceptible areas.
By doing this, you’ll increase protection and keep objects looking great for longer.
Repairing Dents and Scratches
Mike was dismayed to find a dent on his car’s fender one day. He decided to take matters into his own hands and researched how to repair the dent himself. After gathering the necessary materials and tools, he set off on his DIY mission. Despite the difficulties, Mike persevered and succeeded in restoring his car to a pristine state.
Repairing dents and scratches can be tough. But, with the right tools, techniques, and commitment, you can get impressive results. Restore your vehicle’s former glory and show off your skills. Here’s what you need to do:
- Assess the damage. Look closely and determine the depth of the dent or scratch. Is it simple to fix or do you need help?
- Gather materials. Get sandpaper, body filler, primers, matching paint, and clear coat of top quality.
- Repair the area. Start by sanding the damaged area until smooth. Apply body filler if required, and blend it in with the surrounding surface. Then, apply primer, paint, and a clear coat.
- Final touches. Inspect your work for any imperfections. Use polishing compounds if needed for a smooth shine.
Be careful when working on delicate areas. Follow these steps and you’ll soon have your car looking brand new again!
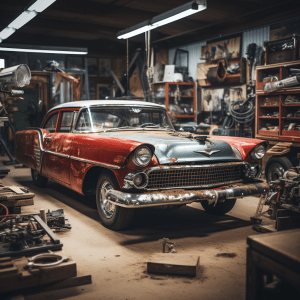
Restoring the Engine and Mechanical Components
Restoring the engine and mechanical components of a car is a crucial part of any restoration project. It involves refurbishing and repairing the powertrain and other mechanical elements to ensure the car’s optimal performance. Here are six essential points to consider when undertaking this task:
- Disassembly: Begin by disassembling the engine and mechanical components, carefully labeling and organizing each part for easier reassembly.
- Cleaning: Thoroughly clean all parts to remove dirt, debris, and old lubricants. Utilize appropriate cleaning agents and tools to ensure the components are free from any contaminants.
- Inspection and Evaluation: Inspect each component for any signs of wear, damage, or faulty parts. Evaluate their condition, identifying which parts can be repaired, rebuilt, or replaced.
- Repairs and Replacements: Perform necessary repairs on damaged components, such as repairing cracks or seals. Replace irreparable or worn-out parts with new or refurbished ones to ensure optimal functionality.
- Reassembly: Carefully reassemble the engine and mechanical elements, following manufacturer specifications and using proper torque settings. Ensure proper alignment and fitment of each part.
- Testing and Fine-tuning: Once reassembled, conduct thorough testing to ensure the engine and mechanical components function correctly. Fine-tune settings as necessary to optimize their performance.
It is important to note that each restoration project is unique, and the specifics may vary depending on the car model and its condition. Attention to detail and precision are crucial to achieving successful restoration results.
A true fact: According to Classic Car Weekly, the demand for car restoration projects has been steadily increasing, with enthusiasts valuing the preservation of automotive history.
Cleaning and Inspecting the Engine
Ignoring this can cause issues and inefficiencies. To achieve optimal performance, it’s crucial to clean and check the engine for any signs of damage or wear.
Here’s a step-by-step guide to clean and inspect the engine:
- Clear out debris: Prior to cleaning, take away any leaves, dirt, or debris from the top or sides of the engine. This will stop them from dropping into sensitive parts during cleaning.
- Use a degreaser: Apply an appropriate engine degreaser to the engine’s surface. Pay attention to areas with heavy grease, like around the oil cap or valve covers. Let the degreaser sit for a few minutes to dissolve the grime.
- Scrub gently: Utilize a soft-bristle brush or a toothbrush to scrub away dirt and grime from different sections of the engine. Be careful not to apply too much pressure, as it may harm delicate components. Focus on hard-to-reach areas like crevices and corners.
- Rinse off with water: After scrubbing, remove the degreaser and loosened dirt using a hose or bucket of water. Don’t use high-pressure water on electrical connectors or sensitive components, as it may cause irrevocable damage.
- Check for leaks or damages: When the engine is clean and dry, thoroughly examine all visible parts for any signs of leaks, damages, or worn-out components. Look for cracks in hoses, loose connections, worn-out belts, or corroded surfaces. Addressing these early can stop further damage.
- Replace filters if required: Examine and replace air filters and oil filters if they are dirty or clogged beyond cleaning. Dirty filters can reduce airflow and the engine’s performance.
It’s important to follow the manufacturer’s guidelines regarding cleaning products and techniques specific to your engine model. Cleaning and inspecting the engine regularly will keep it running smoothly as well as lengthen its lifespan.
A fun historical fact related to cleaning and inspecting engines is that it dates back to when cars first became widespread in the early 20th century. Mechanics soon realized the importance of keeping engines clean and well-maintained for optimal performance. Since then, technology has made it easier and more successful to clean and inspect engines, guaranteeing their durability and efficiency.
Rebuilding or Replacing Parts
Rebuilding or replacing parts is essential when restoring vehicle engines and mechanics. Assessing each part’s condition helps to decide which action is best.
- Rebuilding includes taking apart the parts and replacing worn or damaged components while keeping the original housing. This can be economical and keep sentimental or historic parts.
- Replacing means fully removing the old component and installing a new one. This ensures that the vehicle has up-to-date, safe parts.
- Rebuilt parts may require less time and effort to find than replacements, especially for rarer vehicles.
- Cost, availability, rebuilding expertise, and compatibility with other components should be considered.
Certain parts are better for rebuilding, e.g. pistons and bearings. Others, like brakes and airbags, should be replaced due to safety regulations.
Consult an expert in automotive restoration with experience in similar vehicles for advice on what is best for your vehicle.
Upgrading and Improving Features
Upgrading and enhancing car features can significantly improve its performance and aesthetics. This involves modifying various aspects of the vehicle to enhance its functionality, comfort, and visual appeal.
- Enhance Performance: Upgrading and improving features includes installing a more powerful engine, upgrading the suspension system, and enhancing the braking system. These modifications can result in improved acceleration, handling, and overall performance of the car.
- Upgrade Technology: Upgrading and improving features also involve integrating the latest technology into the car. This can include installing a modern infotainment system, adding advanced safety features such as lane departure warning and adaptive cruise control, and incorporating smart connectivity options.
- Modify Interior and Exterior: Upgrading and improving features extends to the interior and exterior of the car. This can involve installing high-quality upholstery, upgrading the sound system, adding custom lighting, and enhancing the aesthetics through body kit modifications or repainting the car.
By upgrading and improving features, car enthusiasts can transform their vehicles into personalized and high-performing machines. With careful consideration of each modification, they can create a unique driving experience that reflects their style and preferences.
True Story: One car enthusiast, John, decided to upgrade and improve the features of his vintage muscle car. He installed a more powerful engine, upgraded the suspension, and added modern safety features. The result was a car that not only turned heads on the road but also provided a thrilling driving experience. John’s efforts and attention to detail showcased the transformative power of upgrading and improving car features.
If you think untangling a knot of earphones is challenging, just wait until you dive into the labyrinth of an old car’s electrical system during a restoration project.
Electrical Systems
Electrical systems are fundamental for the right working of many devices and appliances. They’re in charge of distributing and controlling electricity over a structure, being an imperative part of today’s infrastructure.
Take a look at the table below that highlights some key features of electrical systems:
| Feature | Description |
|---|---|
| Voltage | Level of electrical potential difference in a system. |
| Current | Flow of electric charge through a conductor. |
| Resistance | Measure of opposition to the flow of current in a circuit. |
| Power | Rate at which work is done or energy is transferred by an electric circuit. |
| Circuit Breaker | Device designed to protect an electrical circuit from damage caused by excess current. |
| Grounding System | Safety measure that provides an alternative path for electric current to flow into Earth. |
Moreover, electrical systems include different safety measures, such as fuses and surge protectors, to guard against power surges and avoid potential dangers.
It’s remarkable to see how electrical systems have evolved. In the late 19th century, Thomas Edison and Nikola Tesla made big impacts to the development and improvement of electrical infrastructure. Thanks to them, we now have more efficient and dependable electrical systems.
Interior and Upholstery
Let’s explore Interior and Upholstery through a stunning table:
| Aspects | Description |
|---|---|
| Material | Durable and luxurious materials like leather, suede, and fabric. |
| Color Options | A wide range of colors such as classic black to vibrant reds. |
| Design | Patterns or plain surfaces to suit individual tastes. |
| Comfort | Plush cushions and ergonomic seating for comfort. |
| Features | Heated seats, massage functions, ambient lighting, and customizable controls. |
In addition, unique details about Interior and Upholstery include:
- Bespoke stitching patterns to reflect personal style.
- Advanced sound insulation to create a quiet cabin.
- Eco-friendly materials such as recycled fabrics or vegan leather.
- Smart technology features like built-in sensors.
Upgrade Interior and Upholstery to create a luxurious and technologically advanced space.
Painting and Finishing Touches
To achieve a professional result in a car restoration project, attention to detail during the painting and finishing stage is crucial. Here are five essential points to consider:
- Preparation: Properly preparing the surface by sanding, filling imperfections, and applying primer is essential for a flawless paint job.
- Choosing the right paint: Consider factors like color, finish, and durability when selecting the paint. Ensure that it matches the original shade or desired look.
- Paint application: Applying multiple thin coats of paint, allowing sufficient drying time between each coat, helps achieve an even and consistent finish.
- Finishing touches: After the paint is dry, carefully polish and wax the surface to enhance glossiness and protect the paint.
- Detailing: Pay attention to the small details such as properly reinstalling trim pieces, ensuring correct alignment, and cleaning any overspray or residue.
Furthermore, it is crucial to carefully consider the unique characteristics of the car being restored and adjust the painting and finishing techniques accordingly. By understanding the car’s original specifications and features, one can accurately replicate its original appearance.
When working on a car restoration project, it is important to follow some suggestions for a successful outcome. Firstly, ensure a clean and dust-free environment in the painting area to avoid any contaminants ruining the paint job. Secondly, invest in high-quality paint and finishing products to ensure longevity. Lastly, seek professional guidance or assistance when needed to acquire expert advice and avoid costly mistakes.
By prioritizing attention to detail, using high-quality materials, and seeking expert guidance, the painting and finishing touches in a car restoration project can dramatically enhance the overall outcome.
After you’re done prepping the surface, the car will look so shiny you’ll want to take it to prom just to show it off…again.
Preparing the Surface
For a smooth painting finish, prepping the surface is key. It takes particular steps to guarantee good paint grip and avoid any flaws appearing. To prep your surface correctly, follow these four steps:
- Clean the surface properly: Before beginning any painting job, it’s a must to remove all dirt, dust, grease, etc. from the surface. Use a gentle cleaner or TSP solution to clean tough stains. Rinse it off and let it dry.
- Fix any damage: Look for any cracks, holes, or blemishes and repair them. Fill in cracks with spackling paste or caulk. Patch small holes with a suitable filler. Sand uneven edges till they’re even. Taking your time is worth it.
- Sand the surface: Even if it looks smooth, sanding is necessary. Use sandpaper or a sanding block to rough up the surface’s texture. This aids the paint in sticking better, creating a more lasting finish.
- Prime if needed: Some surfaces need primer before applying paint. Priming increases coverage, adhesion, and durability of the painted surface. Speak to a local paint supplier or read the manufacturer’s recommendations if uncertain.
Also, remember these tips for the best results:
- Work in a well-ventilated area to reduce fumes and improve drying.
- Use good quality paintbrushes and rollers.
- Give each coat of paint enough time to dry before applying the next.
- Dispose of leftover paint and cleaning materials correctly.
Doing these steps and following these tips will give you a nicely prepared surface, which will allow your chosen paint color to come out perfectly and last a long time.
Applying Primer and Paint
For a flawless finish, it’s key to prime and paint properly. Follow these steps:
- Clean the surface and remove any debris or paint.
- Brush or roll a coat of primer, ensuring it covers the area evenly.
- Once dry, sand to create a smooth base.
- Apply paint with steady brush strokes or roller, starting from the top.
- Wait for each layer to dry before moving on.
Selecting the right primer is essential. Also, consider weather and ventilation for optimal drying and long-lasting results.
Transform your space with a professional-looking paint job! Take the time to prepare, prime, and carefully apply your color – you’ll be pleased with the outcome!
Reassembling the Car
To successfully reassemble the car, follow these steps:
- Component Organization: Organize all the components in a systematic and logical manner. Label and categorize them to ensure easy accessibility during the reassembly process.
- Step-by-Step Installation: Install the components one by one, carefully following the manufacturer’s guidelines and specifications. Use the appropriate tools and techniques for each specific component to ensure proper functionality.
- Quality Check: Once all the components are installed, perform a thorough quality check. Inspect all connections, fastenings, and alignments to ensure everything is in place and functioning correctly.
Additionally, pay attention to any components that may require special attention or adjustments during the reassembly process, such as electrical wirings or intricate mechanical parts.
To avoid missing out on important details and potential issues, it is crucial to plan, organize, and execute the reassembly process meticulously. Each step contributes to the overall success of the car restoration project.
Remember, the joy of driving your perfectly restored car will outweigh any challenges you face during the reassembling process. Embrace the journey and make it as rewarding as the final result.
Preparing to install restored and upgraded components, because nothing says ‘car restoration’ quite like trying to fit a square peg into a round hole…literally.
Installing Restored and Upgraded Components
Precision is essential for the installation of upgraded car parts. Follow these 5 steps for a smooth process:
- Disassemble existing components, noting each piece.
- Carefully examine restored and improved parts before installation.
- Pay attention to measurements and specs when placing the new components.
- Utilize the right tools to firmly attach bolts and screws.
- Test the functionality of the components after installation.
For extra guidance, don’t forget to ask professionals.
Safety first! Put on gloves and goggles when handling pieces or tools.
Wiring and Final Checks
Wiring and final checks are essential for a smooth reassembly of a car. Making sure all electrical components are connected correctly and conducting inspections for quality are necessary. Here are a few steps to follow:
- Inspect Wiring: Watch out for loose or faulty connections.
- Test Electrical Systems: Check lights, signals, windows, and radio.
- Check Battery Health: Make sure the battery is connected and charged.
- Examine Sensors: Inspect temperature, pressure, and speed sensors. Calibrate if needed.
- Perform Final Tests: Activate car features and observe performance.
Additionally, check for frayed wires and other hazards. Safety should be first priority!
My friend learned this lesson the hard way. They assembled a classic sports car, but some wires weren’t connected correctly. This caused electrical glitches. This emphasizes the importance of being meticulous!
So, remember: wiring and final checks are essential for a successful car reassembly.
Testing and Fine-Tuning
The time has come to test and fine-tune after restoring the exterior and interior of your car. Doing this ensures the components work together well, providing nice performance and reliability.
Evaluate the engine’s power output, smoothness, responsiveness, and fuel efficiency. Check electrical components, suspension, braking, and overall functionality.
Look for:
- Abnormal noises or vibrations that could point to a problem.
- Check wiring or connection issues in lights, indicators, wipers, radio, and air conditioning.
- Excessive bouncing or sagging of suspension components.
- Uneven braking or loss of pressure in brakes.
- Door locks, windows, seat adjustments, heater controls, and dashboard indicators.
Testing and fine-tuning needs to be done carefully. It is key to achieving a successful restoration. When I was restoring my classic Mustang, I found a small carburetor issue. It was fixed by making adjustments. Don’t rush this stage! Investing time in testing and fine-tuning will guarantee you great results.
Conclusion
Preparing for a car restoration project needs deep thought and focus. Follow these steps to guarantee a pleasant and successful restoration experience.
- Firstly, make sure to have a clear vision of the end result. Decide upon your aims and plans early on to help you make decisions through the project.
- Do some research to gain knowledge about the exact make and model of the car you are restoring. This info will assist you in getting the right parts, recognizing the original specs, and insuring accuracy of the past.
- Create a plan that contains the essential steps and dates for each stage of the restoration work. This plan will be a guide for your project, letting you stay arranged and on time.
- Allocate a realistic budget for your restoration job. Think about all costs such as parts, tools, labor costs, and unanticipated repairs. It’s important to be ready for any unexpected troubles that may appear during the restoration process.
- In addition, get tips from experienced people or join online groups related to car restoration. These sources can offer meaningful insights, hints, and proposals that can save you money and time.
- At the same time, build contacts with reliable suppliers who can provide genuine parts for your special vehicle model. Making these links will ensure that you obtain high-quality components for your restoration.
During my own car restoration journey, I confronted various issues. But, by meticulously planning each step and searching for advice from other car fans, I was able to surmount obstacles and successfully bring my car back to its original state.
Frequently Asked Questions
Q: What is a car restoration project?
A: A car restoration project is the process of repairing, refurbishing, and bringing a vintage or classic car back to its original condition or improving its overall appearance and performance.
Q: How do I plan a car restoration project?
A: To plan a car restoration project, you should start by setting a budget, determining the level of restoration you want to achieve, creating a timeline, researching and gathering the required parts and materials, and finding a suitable workspace.
Q: How long does a car restoration project typically take?
A: The duration of a car restoration project depends on various factors such as the extent of restoration needed, availability of parts, your level of expertise, and the time you can allocate to the project. It can range from a few months to several years.
Q: How much does a car restoration project cost?
A: The cost of a car restoration project can vary widely based on factors like the make and model of the car, the condition it is in, the level of restoration desired, and the availability of parts. It can range from a few thousand dollars to tens of thousands of dollars or more.
Q: Do I need any specialized tools for a car restoration project?
A: Yes, depending on the specific tasks involved in your car restoration project, you may need specialized tools such as a welder, a paint sprayer, air compressors, sandblasters, engine hoists, and various hand tools. Assess the requirements of your project and acquire the necessary tools accordingly.
Q: Can I undertake a car restoration project as a beginner?
A: Yes, beginners can undertake a car restoration project, but it is advisable to start with a relatively simpler project and gradually tackle more complex ones as you gain knowledge and experience. It is essential to research and educate yourself about different aspects of car restoration before starting.