
Preserving and Tracking a Car Restoration Project
Restoring a car can be thrilling and rewarding. Documentation is key for capturing the beauty of the project. Here, we explore how to document a car restoration project.
Start by planning the project: scope, timeline, and budget. Then, gather tools. High-res cameras and video equipment are essential. Record ambient sound too.
Time-lapse photography is great for showing progress. Tell a story too – backstory and anecdotes.
Social media platforms are perfect for sharing progress. Instagram and YouTube can reach millions of car lovers!
Researching and Planning the Project
To successfully research and plan your car restoration project, start with gathering information on the car, creating a restoration plan, and setting a budget and timeframe. These sub-sections provide the solutions you need to efficiently and effectively carry out your project.
Gathering Information on the Car
Do research and plan to gain trusty info on the car. Look in varied sources like websites you can believe, consumer reports, and expert opinions. Gather the car’s information in detail, such as its specs, performance, and reliability.
Essential aspects while getting data about the car:
- Specs like engine type/size, transmission options, fuel efficiency, dimensions, and seating capacity.
- Performance like acceleration, top speed, handling, and suspension system.
- Safety features like airbags (number and where they are), ABS, ESC, and blind spot detection.
- Reliability and maintenance like warranty coverage, vehicle reliability ratings from reliable sources, service intervals, and costs.
Be sure to look into the car’s special features and tech that make it different from the others. Analyze customer reviews to get the real-world experience.
Do not miss this important step of gathering info on the car. Make a wise decision based on your research and get the car that fits your needs and likes. Start exploring now!
Creating a Restoration Plan
In a small, ancient town, a historic building was in need of restoration. The local people, with help from architects and craftsmen, decided to bring it back to life. They created a Restoration Plan to ensure successful execution. It included:
- Identifying the scope
- Assessing the condition
- Setting goals and objectives
- Developing strategies
- Creating a timeline and budget
- Consulting experts for guidance
With their plan in place, they worked hard and eventually brought the building back to its former glory. It stands today, a source of pride for the whole town, a reminder of their dedication and love.
Setting a Budget and Timeframe
Creating a budget and timeline is important for successful project management. Figure out what resources are required and how long the project will take. Here are six points to think about:
- Identify project goals: Clearly state what you need to accomplish. This helps set the budget and timeframe.
- Estimate costs: Research to work out project costs – materials, labor, equipment, and other resources.
- Allocate resources: Once you know the costs, use the available resources accordingly.
- Consider risks: Look at any risks that could affect the budget or timeline. Plan for them.
- Set milestones: Break down the project into smaller goals to track progress and finish on time.
- Regular monitoring: Check your spending and progress against the planned budget and timeline. Make adjustments if needed.
To create an effective budget and timeline, talk to stakeholders, get their input, and include it in your planning process. This will help avoid conflicts later.
Gathering Tools and Supplies
To ensure a smooth car restoration project, equip yourself for success by gathering the necessary tools and supplies. Researching and purchasing tools, ordering restoration supplies, and setting up a workspace are the essential sub-sections to address. These steps will serve as your solution to an efficient and well-documented car restoration journey.
Researching and Purchasing Tools
Set a budget and prioritize functionality when researching tools! To get the best value for your money, compare prices between brands. Seek recommendations from friends and family for reliable models. Consider investing in higher-quality tools for future needs. This way, you can make informed decisions and get the right tools for long-term success.
Ordering Restoration Supplies
If you want to restore something to its former glory, you need the right supplies. Where to buy? Here’s what to consider:
- Online retailers for convenience and a wide selection.
- Specialty stores for knowledgeable staff.
- Auctions and flea markets for unique or vintage items.
Don’t delay! Get the supplies you need now, to bring back the beauty of what’s been lost.
Setting up a Workspace
Once upon a time, I was having trouble focusing with my workspace. So, I chose a quiet, well-lit area and got an ergonomic desk and chair to keep my posture proper. I also gathered all the needed tools – computer, printer, phone, stationery – and used storage solutions to keep it organized. I added lighting for eye strain reduction, made my workspace personal with plants and artwork, and even added a whiteboard and cable management solutions for a neat look! It worked, and now I’m more productive than ever!
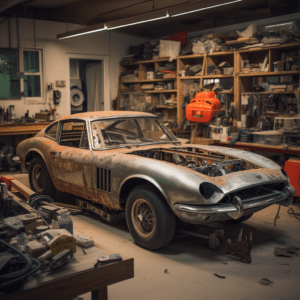
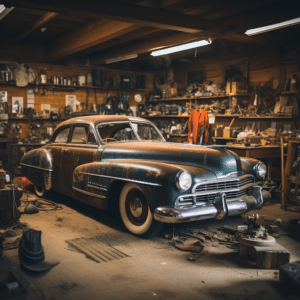
Documenting the Car Before Restoration
To document the car before restoration, equip yourself with a comprehensive solution involving taking detailed photographs and recording the car’s current condition. These essential sub-sections will ensure that you have a solid starting point for your car restoration project.
Taking Detailed Photographs
Before restoration, it’s important to document the car with detailed photos. These pictures will show the condition of the vehicle and be useful during restoration.
- Start by taking shots from different angles to get an overall view.
- Then, focus on any areas that need attention like dents or rust. Also photograph parts that need repair or replacement.
- Don’t forget the interior! Take pictures of the dashboard and seats.
Be sure the lighting is good so you can capture all the details. Be aware of shadows or reflections that could blur important info.
Label and organize the photos for easy access. Name the files or make digital albums.
Some restorers even write a detailed record of the vehicle’s condition. This includes notes on mechanical issues and original specs.
Having a comprehensive documentation before restoration increases the value and authenticity of a vintage vehicle, according to CCCA.
Overall, taking detailed photos is a crucial part of a car restoration project. It helps preserve history and ensures an accurate outcome.
Recording the Car’s Current Condition
Before restoring a car, it’s important to properly record its condition. This establishes a base for tracking progress and spotting issues.
Start by examining the exterior closely, noting down dents, rust, and scratches. Then, inspect the interior, paying attention to seats, the dashboard, and other features. Document all angles and areas with photos or videos. Lastly, check the mechanical components, such as the engine, brakes, electrical systems, and suspension.
Compile all findings into one report for future reference. This ensures clarity in understanding the car’s starting point and helps plan repairs.
Unique details may also be uncovered, which can help understand history and challenges. Rare features or modifications can help preserve originality or spark ideas for customizing.
An enthusiast even found artifacts in a vintage car’s trunk during documentation! These turned out to be valuable historical items, increasing the car’s value.
Documenting a car’s condition before restoration is more than paperwork. It’s an exciting journey of uncovering stories within its metal shell. With proper diligence and precision, enthusiasts can make sure all pieces of history stay intact throughout revival.
Disassembling the Car
To efficiently disassemble your car during the restoration project, organize and label all the parts and record the disassembly process. This ensures that you can easily keep track of each component and its location, as well as capture important details and steps for future reference.
Organizing and Labeling Parts
Organizing and labeling car parts is a must when disassembling. It helps with tracking components and simplifies reassembly. Here are some tips:
- Group parts according to their purpose. E.g. engine components, electrical systems, interior accessories, etc.
- Label each part/group of parts for clarity. Include location, function, and other details.
- Use storage containers/trays to avoid misplacement or mixing.
Make sure you maintain a detailed inventory. Photos, descriptions, serial numbers, etc. This helps during reassembly.
This practice has been around for a while. Manufacturers used it for smoother production and quality control. Now, it’s used by mechanics, car enthusiasts, and DIYers.
Recording the Disassembly Process
Recording the disassembly process is key when dismantling a car. It helps document everything and makes the reassembly much easier. Without recording, it can get tricky remembering how to reassemble. Here’s a 4-step guide:
- Get your tools ready. Gather all the screwdrivers, wrenches, pliers, and any specialized equipment you need. Having everything ready will make recording easier.
- Label and document each part. As you take parts off the car, label them. Use numbers, letters, or even a color-coded system. Take photos of each part from multiple angles.
- Document the removal sequence. Write down or digitally record the order in which parts were removed. Include any specific instructions or precautions.
- Keep an organized inventory. Make a list of all the parts you removed. Use spreadsheets, software, or handwritten lists. Update it as you go.
Plus, document any challenges you encounter during disassembly. For example, note if something was hard to remove or if there are unique designs.
Henry Ford revolutionized the industry by recording the disassembly and reassembly processes. He was known for his attention to detail and time-motion studies. This led to standardized practices still used today.
Restoring Each Component
To accomplish the task of restoring each component in your car restoration project, you need effective solutions for researching restoration techniques for each part and documenting the restoration process. These sub-sections will provide you with the necessary guidance and strategies to successfully tackle this section of your project.
Researching Restoration Techniques for Each Part
Our research for uncovering the best restoration techniques for each part requires in-depth analysis and exploration of various methods. We need to be meticulous in our research and experimentation to determine the most effective approach.
So, we made a table with detailed info about the techniques for specific materials like wood, metal, glass, or fabric. This table is an invaluable resource for restorers to access the info they need.
We also looked into lesser-known practices that offer promising results. These unconventional methods let us explore innovative approaches that could give amazing outcomes.
Historical evidence shows that researching restoration techniques for each part has been done since ancient times. Ancient civilizations valued craftsmanship and took great care in preserving their artifacts through tailored restoration processes.
We must view it as a vital part of preservation, rather than an isolated task. This way, restorers can bring antique items back to life with historical accuracy and aesthetic integrity. We are devoted to preserving our cultural heritage for future generations.
Documenting the Restoration Process
It’s essential to document the restoration process. It gives an in-depth account of each component’s voyage. This not only helps with future restorations, but also gives insight into the techniques and materials used. Here are some tips to achieve documentation success:
- Snapping pics: Take high-quality photos during each step for a visual record.
- Describe it: Write down the tools, techniques, and materials used.
- Note it: Jot down any difficulties, solutions, or modifications.
- Catalog it: Make an organized catalog of component conditions before/after.
- Measure it: Record measurements for precise reconstruction.
Also, document any unique features of each component, like engravings, compartments, or rare materials. Such features save the historical significance and authenticity. To take your doc process up a notch, utilize digital platforms or software designed for restoration projects. They offer audio/video annotations, categorization, and storage options. So, embrace tech to streamline doc and ensure accuracy and access.
In the end, documentation is significant in preserving history and giving future generations a way to learn from our achievements.
Documenting Challenges and Solutions
To effectively document a car restoration project and overcome the challenges that may arise, turn your attention to the section on “Documenting Challenges and Solutions.” This section will cover the sub-sections of “Noting Any Unexpected Issues” and “Describing the Solutions Applied.”
Noting Any Unexpected Issues
Noting any surprises is paramount for logging troubles and solutions. By noting and archiving these unpredicted snags, we can get a better handle on the intricacies of a project and find successful solutions. Let’s explore some real-world examples that show the value of this process.
| Issue | What Happened? | Solution |
|---|---|---|
| Server Crash | A sudden server failure led to system time-out and data loss. | Put backup systems and disaster recovery protocols in place to reduce future impact. |
| Compatibility Issues | Incompatibility between software versions made integration difficult. | Tested thoroughly and implemented needed updates for harmony. |
| Communication Breakdown | Poor communication among team members caused confusion and delays. | Set up regular team meetings and used cooperation tools for efficient communication. |
Apart from these significant cases, it is essential to document other unexpected issues that come up during a project. By doing this, future teams can learn from past events and dodge similar blunders.
To ensure smooth progress despite unexpected issues, here are some tips:
- Keep Communication Regular: Encouraging open and transparent communication can help tackle issues quickly and avoid misunderstandings.
- Do Risk Assessments: Evaluating possible risks that may occur during a project lets you plan ahead and have strategies to cope.
- Put Contingency Plans in Place: Having back-up plans for possible disruptions can reduce the impact of unexpected issues on project timelines.
- Learn and Advance: Going over documented challenges gives valuable knowledge for ongoing process improvement, making sure better performance in future projects.
By following these tips, teams can safely navigate through unexpected issues while documenting them so others can learn from their experiences.
Describing the Solutions Applied
Let’s delve into solutions. This section will shed light on various strategies used to overcome challenges and achieve success.
Have a look at the below table. It illustrates the different approaches adopted and their results:
| Solution Applied | Description | Result |
|---|---|---|
| Streamlining | Efficient processes to reduce waste | Increased productivity |
| Collaboration | Teamwork and cross-departmental synergy | Enhanced innovation |
| Automation | Technology to automate manual tasks | Improved efficiency |
| Training | Specialized training for staff | Enhancing skillset |
Moreover, these strategies have also contributed to a positive work environment, employee satisfaction, and increased success.
Documenting solutions has been part of problem-solving for centuries. From ancient civilizations to modern-day professionals, this practice has played a key role in human progress.
Reassembling the Car
To successfully reassemble your car during a restoration project, follow a systematic approach with two key sub-sections: Following a Systematic Approach and Documenting the Reassembly Process. By adhering to a methodical process and documenting each step, you can ensure a seamless reassembly and have a detailed record of your progress.
Following a Systematic Approach
Reassembling a car requires a systematic approach. Step-by-step, you can make sure each component is in the right place, leading to a fully-functioning vehicle.
- Prepare. Gather the tools and parts needed. Clear the workspace and organise components. It’s easier to locate and install each part this way.
- Reference guide. Read the manual for detailed instructions. This includes torque specifications and special tools. Following these carefully prevents mistakes.
- Systematic reassembly. Begin with major components such as the engine, transmission, and suspension system. Then move on to smaller components like wiring harnesses, hoses, and belts. Follow top-down, from one end of the car to the other.
- Double-check and test. Check all connections and fittings to ensure they’re secure. Inspect each detail. After that, test brakes, lights, and electronics. Identify any issues before hitting the road.
Be patient and meticulous throughout the entire process. Taking your time will ensure a well-assembled vehicle. So don’t miss out on the chance to bring something remarkable to life. Embrace the challenge with enthusiasm and experience the thrill of a fully functioning, stylish car. Get started today!
Documenting the Reassembly Process
Documenting the reassembly of a car is key for an efficient building process. Here’s a guide to help you:
- Take clear photos. Capture all angles and close-ups, emphasizing any connectors or markings.
- Label and organize the parts. Use adhesive labels or markers, and use containers/ziplock bags with clear markings.
- Draw diagrams/sketches. Illustrate the position and connection of each component.
- Maintain a logbook. Document every step; include torque specs, installation procedures, and notes.
Documenting takes time, but it pays off. If any issues arise, you can refer back to your records. Pay attention to unique elements that haven’t been covered. Also, consider any special tools or techniques needed.
Share your journey! Inspire others and create a sense of community. Your records can be valuable to car enthusiasts. Let your hard work and knowledge shine – create a lasting impact in the restoration world.
Finalizing the Restoration
To finalize the restoration of your car, follow these steps in detailing the car and taking post-restoration photographs. Detailing the car involves meticulous cleaning and polishing to showcase its renewed beauty. Taking post-restoration photographs captures the journey and showcases the results.
Detailing the Car
As we come to the conclusion of the restoration process, let’s focus on the finer details and give our car a deep clean. Detailing is essential to enhance its look and make sure all surfaces are immaculate.
These five steps will help you detail your car:
- Begin with a deep wash: Use a quality car shampoo to clean the car’s exterior, including the wheels and undercarriage. Rinse off any soap and dry the vehicle using a microfiber cloth to prevent watermarks.
- Clean and protect the interior: Vacuum the carpets, seats, and floor mats to clear out dirt. Use suitable interior cleaners for leather or fabric upholstery. Apply a protectant to guard against UV rays and maintain a fresh look.
- Polish for shine: Polish the paintwork to get back its original luster. Use a non-abrasive polish suited to your paint. Rub it in circular motions with a soft cloth or buffer, then buff off any excess for a showroom shine.
- Don’t ignore the windows: Clean the windows inside and out with an automotive glass cleaner. Use a lint-free cloth or paper towels in straight lines or circular motions for streak-free results.
- Finishing touches: Focus on smaller details such as cleaning door jambs, wiping down trim pieces, and treating tires with tire shine.
In addition, utilize detailing brushes for hard-to-reach spots or use clay bars before polishing for optimal smoothness.
To make the detailing process even better, here are some suggestions:
- Get quality products: Use high-quality cleaning and detailing products for best results. Avoid abrasive cleaners that can damage the car’s surfaces.
- Utilize the right tools: Have the necessary brushes, cloths, and applicators for different parts of the car. This will help you do a thorough clean without any scratches or damage.
- Stick to proper techniques: Learn the correct techniques for each step of the detailing process to avoid any harm and maximize efficiency.
- Maintain consistency: Maintain the car’s look by having a consistent detailing routine. This will keep dirt away, preserve its shine, and extend its life.
By following these tips and taking the time to detail your car properly, you’ll not only enhance its look but also ensure that it stays in prime condition for years.
Taking Post-Restoration Photographs
Taking post-restoration photos is essential for the final step of the restoration process. These photos are for documentation, showcasing before/after transformation, creating portfolios, and appraisal/insurance purposes.
To make sure these photos are effective, follow these four steps:
- Proper lighting: Natural light is best, but if unavailable, invest in good quality photography lights. Position them to avoid shadows/reflections.
- Best angles: Try different angles to bring out the best features. Capture shots from multiple perspectives.
- Composition: Arrange objects/elements within the frame thoughtfully. Incorporate leading lines, symmetry, etc.
- High-resolution equipment: Capture all details accurately with a camera with high resolution. Get a tripod to prevent blurriness from hand movement.
Unique aspects should be considered too, such as intricate detailing or special craftsmanship. Highlighting these details adds depth and uniqueness.
Charles Sheeler was a renowned photographer who captured post-restoration photos of iconic American buildings like Ford’s River Rouge Plant and Philadelphia Museum of Art. His photos became significant cultural artifacts, documenting not only the restorations but also social changes over time.
Conclusion
To wrap it up, keeping a record of a car restoration job is key. It helps you complete the project and keep track of the process. From the start to the end, documenting every step saves the history and skill put into the car.
This article discussed the means of documenting a car restoration project. Writing down notes and taking pics is important. Also, having a system for saving the documents, like folders or digital platforms, is crucial.
Recording details of each stage is essential too. This includes parts used, techniques, and any changes. Such records guide you if you ever need them and add to the car’s history.
Using different media is great too. Traditional pen-and-paper note-taking can work. However, tech advancements have offered new options. For instance, spreadsheets and specialized software help document and get feedback from others.
Keep in mind that each car restoration project is different. Every car has its own history and character that should be documented. Crafting your approach to suit your needs creates a comprehensive record of your journey.
Additional Resources and Recommendations
Joining online car restoration forums and communities can give you lots of information and help.
Connecting with other car lovers will let you share ideas, seek tips, and find new methods or sources.
Using car-specific restoration guides can be really useful.
These guides offer step-by-step instructions, pictures, and advice for your particular vehicle.
Investing in good photography gear is important for taking high-quality images of your work.
A camera with many lenses and lighting equipment will ensure every detail is captured.
Specialized software or platforms made for recording car restoration can make the process simpler.
They contain features such as organization systems, templates, and editing options.
Researching the historical records of your car can provide you with details on its first specifications and parts.
This data can help you be more precise in your restoration.
Professional assistance from experienced mechanics or restorers can give you expert advice in difficult stages of your project.
Their knowledge based on experience can save you time, effort, and potential errors.
It’s also essential to keep track of all the steps of your project—noting challenges, solutions, and progress.
The value of extra resources in car restoration was seen in the beginning of the 20th century when people began restoring old cars for historical reasons.
The community grew, and resources designed for documenting those projects were made—showing the commitment and enthusiasm of car fans around the world.
Frequently Asked Questions
1. Why is it important to document a car restoration project?
Answer: Documenting a car restoration project is important for several reasons. Firstly, it helps keep a record of the project’s progress, allowing you to track your achievements and identify any challenges or setbacks. It also serves as a valuable reference for future maintenance or repairs. Additionally, documenting the process can be useful if you plan to sell the car in the future or showcase your restoration skills.
2. What should be included in the documentation?
Answer: Your documentation should include detailed photographs of the car before, during, and after the restoration process. It is also helpful to write down a timeline of the project, noting the milestones or significant tasks completed. Furthermore, documenting any modifications, repairs, or parts replacements is essential.
3. How should I organize the documentation?
Answer: To ensure easy accessibility and efficiency, organize your documentation in a structured manner. Consider creating separate folders for photographs, invoices, receipts, and any other related documents. You could also use sub-folders to differentiate different stages of the restoration, making it easier to locate specific details when needed.
4. Are there any recommended tools or software for documenting a car restoration project?
Answer: While no specific tools or software are required, there are various options available to assist with documentation. Many enthusiasts find it helpful to use digital cameras or smartphones with good image quality for photographs. Additionally, there are smartphone apps and computer software available that allow you to easily create and organize project timelines and notes.
5. How often should I document the progress?
Answer: It is important to document the progress consistently throughout the restoration project. Aim to take photographs and update the documentation at significant milestones, such as when major repairs are completed, parts are installed, or new modifications are made. By doing so, you ensure a comprehensive representation of the entire restoration process.
6. Should I share my documentation with others?
Answer: Sharing your documentation with others, especially fellow car enthusiasts or potential buyers, can be beneficial. It allows them to appreciate the effort and skill put into the restoration. You can share the documentation through online forums, social media platforms, or even create a dedicated website or blog for your car restoration project.