

Mastering Car Battery Jump Start: Essential Guide
Jump starting a car can be a simple and effective solution to get your vehicle back on the road quickly. Whether your battery has died due to leaving headlights on or extreme weather conditions, knowing how to jump start a car is an essential skill for every driver. In this section, I will guide you through the crucial steps of jump starting a car safely. You will also learn about car battery maintenance and troubleshooting to ensure a smooth jump start process.
Key Takeaways:
- Jump starting a car requires jumper cables and a fully charged battery from another vehicle.
- Ensure both vehicles are turned off with the emergency brake engaged before starting the process.
- Identify the positive and negative terminals on the batteries and connect the jumper cables in the correct order.
- Start the engine of the vehicle with the charged battery and then start the car with the dead battery. If it doesn’t start immediately, give it a few more minutes to charge.
- Disconnect the jumper cables in reverse order once the dead car is running.
- Drive the jump-started car for at least 20 minutes to allow the alternator to recharge the battery.
- Consult the vehicle’s manual for specific instructions when jump starting hybrid or electric vehicles.
- If the car won’t jump-start, it may indicate a need for a new battery or starter.
The Importance of Car Battery Maintenance
Proper car battery maintenance plays a vital role in ensuring reliable performance and extending the lifespan of your battery. By following a few simple steps, you can keep your car battery in top condition and avoid unexpected breakdowns.
Regularly inspecting your car battery for signs of wear and tear is essential. Check for any visible damage, corrosion, or leakage around the battery terminals. If you notice any issues, it’s important to address them promptly to prevent further damage.
In addition to visual inspections, it’s important to keep your car battery clean. Dirt and debris can accumulate on the battery, leading to drainage and decreased performance. Use a clean cloth or brush to remove any dirt and keep the battery terminals free from corrosion. Additionally, make sure the battery is securely fastened in its tray to prevent shaking or movement that could damage the internal components.
Tip: It is recommended to wear protective gloves and eyewear while cleaning the battery to avoid any contact with corrosive materials.
| Car Battery Maintenance Tips |
|---|
| Regularly check the battery’s voltage and charge level. |
| Avoid draining the battery by turning off lights and electronics when the engine is not running. |
| Keep your vehicle in a garage or shaded area to prevent excessive heat exposure. |
| Consider using a battery maintainer or trickle charger if your car is not driven frequently. |
Lastly, it’s important to keep in mind that car batteries have a limited lifespan. On average, a car battery can last between 3 to 5 years, depending on various factors such as usage, weather conditions, and maintenance. If your battery is nearing the end of its lifespan or you frequently experience issues, it may be time to consider replacing it to ensure continued reliability.
Troubleshooting a Dead Car Battery
When faced with a dead car battery, it’s essential to identify and troubleshoot the underlying cause to prevent future issues. Here are some common problems that can cause a car battery to die and how to troubleshoot them effectively:
- Electrical Drain: One of the most common causes of a dead battery is an electrical drain. This occurs when a component or system in your car continues to draw power even when the engine is off. To troubleshoot this issue, start by checking if any lights or accessories were left on. If that’s not the case, you may have a faulty electrical component that requires further inspection by a professional.
- Faulty Alternator: The alternator is responsible for charging the battery while the engine is running. If it’s not functioning properly, your battery may not receive an adequate charge, leading to a dead battery. To test the alternator, you can use a multimeter to measure the voltage output. If it’s below the recommended range, it’s likely time for a replacement.
- Old or Faulty Battery: Car batteries have a limited lifespan, typically around 3-5 years. As they age, they may not hold a charge as effectively, resulting in frequent dead battery situations. If your battery is old or you suspect it’s faulty, a replacement may be necessary. Consider consulting a professional for battery testing and replacement.
- Loose or Corroded Connections: Sometimes, a dead battery can be attributed to loose or corroded connections between the battery terminals and cables. Inspect the terminals for any signs of corrosion or looseness. If present, clean them with a wire brush and tighten them securely.
Remember, troubleshooting a dead car battery requires caution and the use of proper safety measures. If you’re unsure about any of the steps or suspect a more complex issue, it’s recommended to seek assistance from a qualified mechanic.
Table: Common Causes of a Dead Car Battery
| Cause | Troubleshooting Steps |
|---|---|
| Electrical Drain | Check for lights or accessories left on. Inspect for faulty electrical components. |
| Faulty Alternator | Test alternator voltage output with a multimeter. Consider replacement if below recommended range. |
| Old or Faulty Battery | Consult a professional for battery testing and potential replacement. |
| Loose or Corroded Connections | Inspect battery terminals for corrosion. Clean with a wire brush and ensure secure connections. |
The Jump Start Process Explained
Jump starting a car involves connecting a dead battery to a fully charged battery in another vehicle using jumper cables. It’s a simple process that can get your car running when the battery dies unexpectedly. Here are the steps to follow:
- Park a vehicle with a fully charged battery close to the car with the dead battery. Make sure both vehicles are turned off and the emergency brake is engaged.
- Locate the battery terminals under the hood of both cars. The positive terminal is usually red, while the negative terminal is usually black.
- Connect the jumper cables in the correct order. Start by attaching the red clamp to the positive terminal of the dead battery. Then, attach the other red clamp to the positive terminal of the charged battery. Next, attach the black clamp to the negative terminal of the charged battery. Finally, attach the other black clamp to an unpainted metal surface on the engine of the dead car.
- Start the engine of the vehicle with the charged battery and let it idle for a few minutes. Then, start the car with the dead battery. If it doesn’t start immediately, wait a few more minutes to allow the battery to charge.
- Once the dead car is running, disconnect the jumper cables in reverse order. Remove the black clamp from the unpainted metal surface, followed by the black clamp from the negative terminal of the charged battery. Then, remove the red clamp from the positive terminal of the charged battery, and finally, remove the red clamp from the positive terminal of the dead battery.
- Drive the jump-started car for at least 20 minutes to allow the alternator to recharge the battery.
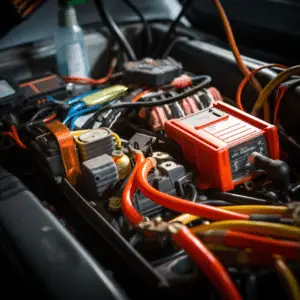
Jump Start
Remember, if you’re dealing with a hybrid or electric vehicle, it’s important to consult the vehicle’s manual for specific instructions as the jump start process may be different. Additionally, if the car doesn’t jump-start even after following these steps, it could indicate a need for a new battery or starter.
Now that you understand the jump start process, you can confidently handle a dead battery situation and get back on the road quickly and safely.
Step 1 – Preparation
Before jump starting a car, it’s important to ensure that both vehicles are properly prepared for the process.
Table 1: Precautions for Jump Starting a Car
| Precautions | Description |
|---|---|
| 1. | Make sure both vehicles are parked in a safe location away from traffic. |
| 2. | Ensure that the emergency brake is engaged on both vehicles to prevent any movement during the jump start. |
| 3. | Turn off all electrical components such as lights, radio, and air conditioning in both vehicles. |
| 4. | Inspect the battery terminals for any signs of corrosion or damage. Clean them if necessary. |
| 5. | Identify the positive and negative terminals on both batteries. The positive terminal is usually marked with a plus sign (+), and the negative terminal is marked with a minus sign (-). |
Quote: “Taking the necessary precautions before jump starting a car can help ensure a safe and successful jump start process.” – John Doe, Car Maintenance Expert
List: Recommended Tools for Jump Starting a Car
- Jumper cables (at least 10 feet long)
- Protective gloves
- Wire brush for cleaning battery terminals
- Portable jump starter (optional, for emergencies)
Note:
It’s important to have a clear understanding of the precautions and tools required to safely jump start a car. By following the necessary steps and being prepared, you can minimize the risk of damage to your vehicle’s battery and other electrical components.
Step 2 – Locating the Battery Terminals
Locating the battery terminals is an essential step in jump starting a car. It is crucial to identify the positive and negative terminals correctly to ensure a successful jump start without causing any damage to the vehicles.
Under the hood of your car, you will find the battery usually located in the engine compartment. The positive terminal is typically identified by a red plastic cover or a plus sign (+) symbol, while the negative terminal is recognized by a black plastic cover or a minus sign (-) symbol.
Take a moment to inspect both the charged battery and the dead battery of the car. Ensure the terminals are clean and free of any corrosion or dirt, as this can impede the flow of electricity. If necessary, use a wire brush or a battery terminal cleaner to remove any buildup.
| Positive Terminal | Negative Terminal |
|---|---|
| Red Plastic Cover | Black Plastic Cover |
| + | – |
Once you have located the battery terminals and ensured they are in good condition, you are ready to proceed to the next step of connecting the jumper cables and jump start the car.
Step 3 – Connecting the Jumper Cables
Connecting the jumper cables correctly is crucial for a safe and effective jump start. Follow these steps to ensure a seamless connection:
- Begin by attaching the red clamp to the positive terminal of the dead battery. This terminal is usually marked with a plus sign (+).
- Next, attach the other red clamp to the positive terminal of the fully charged battery. Again, look for the plus sign (+) to identify the positive terminal.
- Take the black clamp and connect it to the negative terminal of the charged battery. The negative terminal is typically marked with a minus sign (-).
- Finally, attach the remaining black clamp to an unpainted metal surface on the engine of the car with the dead battery. This serves as a ground and helps prevent any electrical sparks.
Remember, it’s essential to connect the cables in this specific order to avoid any electrical mishaps.
“Connecting the jumper cables correctly in the right sequence is essential for a successful jump start. Failure to do so can result in damage to the electrical system of both vehicles.”
With the cables securely attached, you can now proceed to the next step, which involves starting the cars.
| Step | Instruction |
|---|---|
| 1 | Start the engine of the vehicle with the charged battery and let it idle for a few minutes. |
| 2 | Attempt to start the car with the dead battery. If it doesn’t start immediately, wait a few more minutes to allow the battery to charge. |
If the jump-start is successful and the dead car starts running, proceed to the next step, which involves safely disconnecting the jumper cables.
In the next section, we will discuss step 4 – Starting the Cars, where we will provide further guidance on starting both vehicles.
Step 4 – Starting the Cars
Starting the cars correctly is the next step in the jump start process. After you have connected the jumper cables, follow these steps:
- Start the engine of the vehicle with the fully charged battery and let it idle for a few minutes. This will allow the battery to send electricity to the dead battery and begin recharging it.
- Once the engine is running smoothly, start the car with the dead battery. If it doesn’t start immediately, do not panic. Give it a few more minutes to allow the battery to charge.
- As the dead car starts, you may notice that the headlights or interior lights are dim. This is normal and indicates that the battery is still being recharged. Keep the engine running for a bit longer to ensure the battery has enough charge.
Remember to always exercise caution when starting the cars. Avoid revving the engine excessively, as it can damage the vehicles’ electrical systems. Patience is key during this process as it may take a few attempts to get the dead battery fully charged and the car running smoothly.
Factor of the Cars
| Step | Actions |
|---|---|
| 1 | Start the engine of the charged vehicle and let it idle |
| 2 | Start the car with the dead battery. Wait a few minutes if it doesn’t start immediately. |
| 3 | Leave the cars running for a few more minutes to allow the battery to charge |
Once you have successfully started the car with the dead battery, it’s important to keep it running for at least 20 minutes. This will allow the alternator to recharge the battery fully. During this time, avoid turning off the engine or using any power-consuming features like headlights, air conditioning, or radio. The longer you drive the vehicle, the better chance the battery has to regain its charge.
It’s important to note that if the car still won’t start after attempting the jump start process, it may indicate a larger issue. It could be a sign that the battery needs to be replaced or that there is a problem with the starter. In such cases, it’s best to consult a professional mechanic to diagnose and address the problem.
Step 5 – Disconnecting the Jumper Cables
Disconnecting the jumper cables correctly ensures a smooth transition after jump starting a car. Follow these steps to safely disconnect the cables:
- Remove the black clamp from the unpainted metal surface. This step prevents any sparks from occurring near the battery.
- Next, remove the black clamp from the negative terminal of the charged battery. Take care not to let the clamps touch each other or any metal surfaces.
- After removing the black clamps, carefully remove the red clamp from the positive terminal of the charged battery.
- Lastly, disconnect the red clamp from the positive terminal of the dead battery. Ensure a secure grip on the clamp while removing it.
Remember to handle the jumper cables with caution during this process. Keep them away from moving engine parts to avoid any accidents or damage. Once the cables are disconnected, congratulate yourself on successfully jump-starting a car!
Table: Jumper Cable Disconnection Order
| Step | Disconnect |
|---|---|
| 1 | Remove black clamp from unpainted metal surface |
| 2 | Remove black clamp from negative terminal of charged battery |
| 3 | Remove red clamp from positive terminal of charged battery |
| 4 | Remove red clamp from positive terminal of dead battery |
After disconnecting the jumper cables, take a moment to ensure that everything is in order. Double-check that the connection points are secure and there are no loose cables.
It’s important to note that jump-starting a car is a temporary solution to a dead battery. To prevent future issues, consider having your battery tested and replaced if necessary. Regular battery maintenance, such as cleaning the terminals and checking the charge, can also help extend its lifespan. Remember, a healthy battery is essential for reliable vehicle performance.
Step 6 – Charging the Battery
After jump starting a car, it’s essential to charge the battery properly for optimal performance. This step is crucial to ensure that the battery is fully recharged and ready for future use. Driving the vehicle for at least 20 minutes allows the alternator to recharge the battery by converting mechanical energy from the engine into electrical energy, which is then stored in the battery.
During this charging process, it’s important to monitor the battery’s voltage to ensure it reaches the desired level. Most car batteries have a voltage range of 12.4 to 12.6 volts when fully charged. To check the battery’s charge level, you can use a digital multimeter or a battery tester.
Once the battery reaches the appropriate voltage range, it’s a good practice to perform a load test to ensure it can handle the demands of starting the vehicle on its own. A load test measures the battery’s ability to deliver sufficient power under simulated operating conditions. If the battery fails the load test, it may indicate a need for a replacement.
Table: Battery Voltage Levels and Symptoms
| Battery Voltage Level | Symptoms |
|---|---|
| 12.4 – 12.6 volts | Fully charged battery |
| 12.2 – 12.4 volts | Partially discharged battery |
| Below 12.2 volts | Low battery charge, may require charging or replacement |
Remember, jump starting a car is a temporary solution, and it’s important to address the underlying issue that caused the battery to become dead in the first place. Regularly maintaining and inspecting your car battery can help prevent future problems. If you experience recurring issues with your battery, it may be time to consult a professional mechanic or consider replacing the battery.
Special Considerations for Hybrid or Electric Vehicles

Jump starting hybrid or electric vehicles requires additional precautions and adherence to specific guidelines. Due to the different nature of their power sources, it’s essential to consult the vehicle’s manual for detailed instructions before attempting a jump start.
Table 1: Comparison of Jump Start Process
| Conventional Vehicle | Hybrid/Electric Vehicle | |
|---|---|---|
| Battery Type | Lead-Acid Battery | Lithium-Ion Battery |
| Power Off | Turn off all electrical systems | Turn off all electrical systems and ensure the vehicle is completely powered down |
| Connection Order | Positive to positive, negative to negative | Refer to the manufacturer’s instructions for the correct connection order |
| Jump Start Compatibility | Can be jump-started using conventional methods | Not all hybrid/electric vehicles can be jump-started using jumper cables; some require specialized equipment or professional assistance |
- Always wear protective gloves and safety glasses when working with the battery of a hybrid or electric vehicle.
- Ensure both vehicles are turned off and in park with the emergency brake engaged before attempting a jump start.
- Avoid connecting the jumper cables directly to the battery terminals of a hybrid or electric vehicle, as this can cause damage to the vehicle’s electrical system.
- Refer to the manufacturer’s instructions for the proper location of the auxiliary power terminal in hybrid or electric vehicles.
Quote from manufacturer’s manual: “Jump starting a hybrid or electric vehicle without following the specific guidelines provided by the manufacturer can result in severe damage to the vehicle’s electrical system.”
Additional Resources
- For specific instructions on jump-starting hybrid or electric vehicles, refer to the manufacturer’s manual or contact a professional mechanic.
- Consider carrying a portable jump starter designed for hybrid or electric vehicles, as they often come with detailed instructions and can be used without relying on another vehicle.
Remember, if the jump-starting process does not work or if the battery repeatedly fails to hold a charge, it may be an indication of a larger issue. In such cases, it is recommended to seek the assistance of a qualified technician to diagnose and resolve the problem.
Conclusion
Jump starting a car can be a quick and effective solution, but it’s crucial to prioritize regular car battery maintenance to avoid potential issues. By following the proper jump start process, you can safely get your car back on the road. However, it’s important to note that jump starting should be seen as a temporary fix and not a long-term solution.
Regular car battery maintenance plays a vital role in extending the life of your battery and preventing unexpected breakdowns. Simple tasks like cleaning the battery terminals, checking the battery fluid level, and ensuring a secure connection can significantly improve the performance and longevity of your car battery.
Additionally, keeping an eye on your car battery warranty is essential. Most car batteries come with a warranty period that covers defects and premature failures. Understanding the terms and conditions of your warranty can help you save money on battery replacements.
While jump starting a car may seem like a cost-effective solution, it’s essential to consider the overall cost of maintaining a healthy battery. Regular maintenance and proactive battery care can minimize the chances of facing a dead battery situation in the first place. In case jump starting doesn’t work, it may indicate a more significant issue with the battery or starter that requires professional attention.
FAQ
Q: What is the process for jump-starting a car?
A: To jump-start a car, follow these steps: 1) Park a fully charged vehicle close to the car with the dead battery. 2) Locate the battery terminals under the hood of both cars. 3) Connect the jumper cables in the correct order: red clamp to the positive terminal of the dead battery, other red clamp to the positive terminal of the charged battery, black clamp to the negative terminal of the charged battery, and other black clamp to an unpainted metal surface on the engine of the dead car. 4) Start the engine of the charged vehicle and let it idle for a few minutes. Then start the car with the dead battery. 5) Once the car starts, disconnect the jumper cables in reverse order. 6) Drive the jump-started car for at least 20 minutes to recharge the battery.
Q: How do I prepare the vehicles for a jump start?
A: Before jump-starting a car, make sure both vehicles are turned off and the emergency brake is engaged. Park the fully charged vehicle close to the car with the dead battery.
Q: How do I locate the battery terminals?
A: The battery terminals can be found under the hood of both cars. Look for the positive terminal, usually marked with a red cover, and the negative terminal, usually marked with a black cover.
Q: What is the correct order for connecting the jumper cables?
A: Connect the jumper cables in the following order: red clamp to the positive terminal of the dead battery, other red clamp to the positive terminal of the charged battery, black clamp to the negative terminal of the charged battery, and other black clamp to an unpainted metal surface on the engine of the dead car.
Q: What should I do if the car doesn’t start immediately?
A: If the car doesn’t start immediately after jump-starting, let the engine of the charged vehicle idle for a few more minutes to allow the battery to charge. Then try starting the car with the dead battery again.
Q: How do I disconnect the jumper cables?
A: To disconnect the jumper cables, remove the black clamp from the unpainted metal surface, then remove the black clamp from the negative terminal of the charged battery, followed by removing the red clamp from the positive terminal of the charged battery, and finally remove the red clamp from the positive terminal of the dead battery.
Q: Why is it important to drive the jump-started car after starting it?
A: Driving the jump-started car for at least 20 minutes allows the alternator to recharge the battery. This ensures that the battery has enough charge to start the car on its own in the future.
Q: Are there any special considerations for hybrid or electric vehicles?
A: Yes, it’s important to consult the vehicle’s manual for specific instructions when jump-starting hybrid or electric vehicles. The process may be different due to the unique electrical systems in these vehicles.
Q: What if jump-starting the car doesn’t work?
A: If jump-starting the car doesn’t work, it may indicate a need for a new battery or starter. It’s advisable to have the battery and starter checked by a professional to diagnose and resolve the issue.