
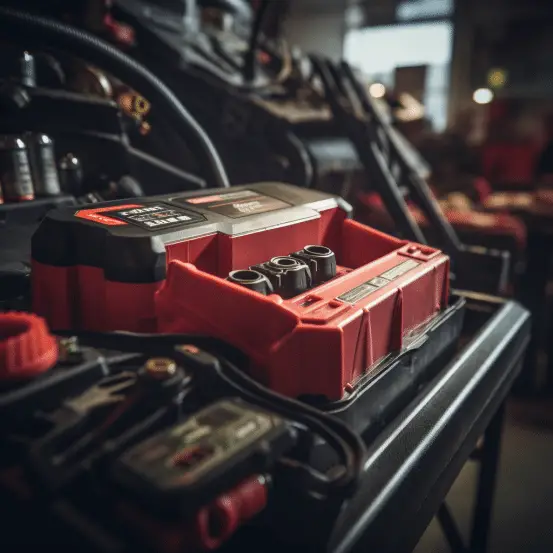
Expert Guide: Safe Car Battery Installation for Beginners

Don’t worry if you need to install a car battery! Here’s a guide to help you get it done like a pro. Firstly, make sure you are safe by wearing gloves and goggles. Locate the battery in your vehicle – in the engine compartment or trunk. Read the instructions and warnings carefully.
Next, disconnect the negative terminal (indicated by a minus sign) and then the positive terminal (indicated by a plus sign). Loosen the bolts with the correct tools and remove any holding brackets. Lift out the old battery and set it aside.
Time to install the new battery! Clean the tray with a wire brush. This allows for proper contact between the new battery and its connection points. Put the new battery in the tray.
Reconnect the positive terminal first, followed by the negative terminal. Ensure tight connections but don’t overtighten. Check everything is fastened and correctly positioned.
You’ve done it! Now, maintain your battery for optimal performance and longevity. Look out for corrosion or loose connections. If unsure, consult a mechanic.
Finally, give your car the power it deserves with a fresh battery installation. Enhance your vehicle’s performance and reliability. A well-functioning battery is essential for safe driving experiences. Have fun and drive safely!
Step 1: Gather the necessary tools and materials
Gather all the things you need to install a car battery! This is a key step to ensure success. Here’s the list:
- A new battery – Make sure it fits your vehicle.
- Safety goggles – Protect your eyes.
- Protective gloves – Keep your hands safe.
- Adjustable wrench/pliers – To loosen and remove cables from the old battery.
- Battery terminal cleaner – To remove dirt and corrosion.
- Battery terminal brush – To clean hard-to-reach areas.
Store these items in a place you can access easily. Having them ready will help you stay on track.
Be careful when handling a car battery–it contains dangerous chemicals. Disconnect power and turn off your engine before starting the installation.
Fun Fact: Electric cars were first introduced in the early 19th century, but batteries weren’t integrated into automobiles until 1890. Thanks to technology, installing a car battery is now simpler for many people.
Step 2: Prepare the car for battery installation
When preparing the car for battery installation, certain steps need to be followed. These steps ensure a smooth and efficient installation process without any hiccups. Here is a step-by-step guide to help you prepare your car for battery installation:
Disconnect the negative terminal:
Locate the negative terminal on the car’s battery and use a wrench to loosen and remove the terminal clamp. This will prevent any accidental electrical shocks during the installation process.
Disconnect the positive terminal:
Locate the positive terminal on the car’s battery and, similar to the previous step, use a wrench to loosen and remove the terminal clamp. It is important to disconnect the positive terminal after the negative terminal to avoid any potential electrical issues.
Remove the battery hold-down clamp:
In order to safely remove the old battery, locate the hold-down clamp that secures the battery in place. Loosen the clamp using a wrench or socket set and carefully lift the clamp away from the battery.
Remove the old battery:
After the hold-down clamp has been removed, you can safely lift out the old battery from the car. Be cautious while handling the battery as it can be heavy and potentially hazardous if mishandled.
Clean the battery terminals:
Before installing the new battery, it is essential to clean the battery terminals to ensure proper electrical connection. You can use a battery terminal cleaner or a paste made of baking soda and water to remove any corrosion or buildup on the terminals.
Install the new battery:
Carefully place the new battery into the car’s battery tray, ensuring it is properly aligned. Reattach the hold-down clamp and tighten it securely. Next, connect the positive terminal followed by the negative terminal, making sure to tighten the clamps snugly.
These steps will help you prepare your car for battery installation in a systematic and organized manner. It is important to follow these steps carefully to ensure a successful battery installation without any complications.
In addition to the steps mentioned above, it is crucial to always refer to your car’s owner manual for any specific instructions or precautions related to battery installation. Different car models may have slightly different procedures, so it is important to be aware of any unique details or variations that may apply to your specific car.
Furthermore, it is always recommended to consult a professional mechanic or seek assistance if you are unsure or uncomfortable performing the battery installation yourself. Safety should always be a priority when working with car batteries.
Let me share a true story to emphasize the importance of preparing the car for battery installation. Once, a car owner neglected to disconnect the negative terminal before working on the battery. As a result, they unintentionally caused a short circuit, damaging the car’s electrical system. This incident led to costly repairs and served as a valuable lesson on the significance of following proper installation procedures.
Remember, by taking the necessary steps to prepare your car for battery installation, you can ensure a smooth and safe process, avoiding any potential issues or damage.
Finding the battery is like playing hide-and-seek, just hope it doesn’t shout ‘I’m behind the headlight!’ in a high-pitched voice.
Turn off the engine and locate the battery
Time to get your car ready for a new battery! Follow this guide to make sure you take the right steps.
- Park in a ventilated spot.
- Switch the engine off for safety.
- Open the hood and secure it if necessary.
- Find the battery – usually near the front. It may be in a case or have a cover.
- Note the positive (+) and negative (-) terminals.
Also:
- Prepare all tools and safety gear.
- Ask for help if unfamiliar with engines and batteries.
Now that you know how to turn off the engine and locate the battery – make sure you don’t skip this essential step. Get your car in tip-top shape with a new battery!
Put on safety gloves and goggles
It’s essential to wear safety gloves and goggles during your car battery installation process. These protective items will keep you safe and prevent any accidents. Here’s how to wear them correctly:
- Start off by washing your hands with soap and water.
- Grab a pair of gloves that fit snugly.
- Slide each hand in, taking care not to rip them.
- Tighten the cuffs around your wrists.
- Pick a pair of goggles that covers your eyes properly.
- Place them over your eyes and ensure they don’t obstruct your view.
Safety gloves and goggles keep you safe from harm and give a professional look. Additionally, take off any rings or bracelets that might interfere with glove fitment. About 30% of car battery failures are due to wrong installation techniques, so these measures are important for successful battery installation.
Step 3: Disconnect the old battery
Disconnecting the old battery is an essential step in installing a new car battery. By following these instructions, you can safely remove the old battery without any damage or injury.
First:
ensure that the car engine is turned off and the keys are removed from the ignition.
Locate the car’s battery:
usually found under the hood. It is a rectangular-shaped box with positive and negative terminals.
Identify the negative terminal:
which is marked with a “-” symbol or the letters “NEG” or “BAT -“. It is usually black in color. This terminal is connected to the car’s chassis.
Carefully loosen the nut or bolt that secures:
the negative cable to the negative terminal using a wrench or socket. Once loosened, carefully remove the cable from the terminal.
- Be cautious not to touch any metal part of the car with the wrench or socket, as it may cause a short circuit.
- If there is any corrosion on the terminal or cable, clean it using a wire brush before disconnecting.
Next, locate the positive terminal:
which is marked with a “+” symbol or the letters “POS” or “BAT +”. It is usually red in color. This terminal is connected to the car’s electrical system.
- Avoid touching the positive terminal while disconnecting the negative terminal to prevent accidental electrical discharge.
Repeat the same steps as before:
loosening the nut or bolt that secures the positive cable to the positive terminal and then carefully removing the cable from the terminal.
Remember, always disconnect the negative terminal before the positive terminal to prevent any electrical mishaps. Once both cables are disconnected, you have successfully disconnected the old battery.
Now that you have completed this step, let’s move on to the next step of installing the new car battery. Keep following the instructions carefully to avoid any mistakes and ensure a successful battery replacement.
Don’t miss out on the opportunity to properly install your new car battery and enjoy a reliable and efficient vehicle. Take action now and continue with the next steps to complete the installation process.
Finding the positive and negative terminals is a bit like playing that classic game of ‘hot and cold’ with electricity—don’t worry, getting shocked just adds a little excitement to the installation process.
Identify the negative and positive terminals
Successfully disconnecting the old battery requires correctly identifying the negative and positive terminals. Otherwise, attempting to remove it may result in damage or injury. Here’s info to help you recognize them easily.
Negative Terminal: Usually has a Minus (-) sign. On the right side.
Positive Terminal: Usually has a Plus (+) symbol. On the left side.
Battery makers may have variations in labeling or placement. But, usually, the negative terminal is marked with a minus sign and is on the right side. The positive terminal has a plus sign and is to the left.
Be careful when disconnecting the terminals! If done in the wrong order, it can cause electrical short circuits and other problems. So, double-check your identification before proceeding.
Pro Tip: Wear gloves when handling any battery-related tasks. It’s a safety measure against electric shocks.
Loosen the terminal clamps using a wrench
Mark was in a rush for a meeting and his car battery died. He grabbed his wrench and carefully loosened the terminal clamps. To do this safely, he followed these steps:
- Identified negative and positive terminals.
- Used an appropriate sized wrench to loosen the securing clamps.
- Gently wiggled the clamps to break any corrosion/sticking.
Protective gloves and eyewear were essential for safety. Disconnecting the negative terminal first was recommended to reduce the risk of accidental sparks. Vehicle models may have slight differences, so consult your manual first. Knowing how to do simple tasks like this can be a lifesaver!
Remove the negative terminal first, followed by the positive terminal
As you pursue replacing the old battery, handling the disconnection with caution is key. Start by removing the negative terminal before the positive – this is a vital step for a smooth transition. Here’s how:
- Find the negative terminal – it’s often marked with a minus (-) sign.
- Unfasten and take away any bolts or nuts that secure the terminal, with the right wrench or socket.
- Lift and detach the negative terminal from the battery, carefully avoiding any metal surfaces and contact with other metal components.
- Now locate the positive terminal – it’s usually marked with a plus (+) sign.
- Remove any bolts or nuts securing the terminal, using an appropriate tool.
- Carefully lift and detach the positive terminal, making sure it doesn’t touch any electrical parts.
These steps ensure safety when removing both terminals. This sequence can help prevent potential electrical hazards and make the replacement process go smoothly.
Remember that different vehicle models may have their own requirements or variations. To gain additional insights specific to your vehicle, consult the manual or get professional advice.
Let’s look to the past – the practice of removing the negative terminal first began with early automotive engineering. Mechanics observed that doing this reduced the risk of electrical shorts or sparks, ensuring safety for the technician and the vehicle. This precaution is still practiced today.
Step 4: Remove the old battery from the car
Removing an old battery from your car is a must. Here’s how to do it:
- Find the battery in the engine compartment. It’s near the fender or on one side.
- Disconnect the negative terminal with a wrench or socket set. It’s usually marked with a minus (-) and is black.
- After that, disconnect the positive terminal. It’s usually marked with a plus (+) and is red.
- Lift the battery straight up and out of its tray or holder. It can be heavy, so be careful!
Different car models may require different steps. Check your car manual for instructions.
Fun fact: A lead-acid car battery can weigh 30-50 pounds!
Step 5: Install the new battery
To install the new battery, follow these steps:
- Disconnect the negative cable: Locate the negative terminal on the old battery and use a wrench or pliers to loosen the nut. Once loose, remove the cable from the terminal.
- Remove the old battery: Take out the old battery by carefully lifting it out of the battery tray. Be cautious not to tip or spill any battery acid during this process.
- Clean the battery tray: Before installing the new battery, clean the battery tray with a mixture of baking soda and water. This will help remove any corrosion or dirt that may have built up over time.
- Install the new battery: Carefully place the new battery into the battery tray, ensuring that the positive and negative terminals align correctly. Attach the positive cable first, tightening the nut securely. Then, reconnect the negative cable to its terminal.
- Secure the battery: Make sure the battery is securely fastened in the battery tray to prevent it from moving or shaking while driving. Double-check that all connections are tight and secure.
It’s important to note that each vehicle may have slight variations in battery installation procedures. It is always recommended to consult the vehicle’s owner manual for specific instructions.
The history of car batteries dates back to the early 19th century when Italian scientist Alessandro Volta invented the first truly functional battery known as the Voltaic Pile. Since then, batteries have evolved significantly, becoming an essential component of modern vehicles. The installation process has also become more straightforward, thanks to advancements in technology and safety standards.
Positioning a new car battery is like playing a game of Tetris, just make sure you don’t accidentally connect it to your video game console.
Position the new battery in the battery tray
Placing the fresh battery in its tray is vital in the setup process. It makes certain the battery fits snugly and works accurately inside the apparatus. Here’s what to do:
- Gently raise the battery and take care.
- Find the battery tray, typically at the bottom or back of the device.
- Match the new battery with the slots or connectors on the tray.
- Ensure the positive and negative terminals of the battery are compatible with the tray’s.
- Press down softly but firmly to secure the battery.
- Examine that there are no loose connections or gaps prior to continuing.
Handle the new battery cautiously to avoid any harm or injury during the process.
Remember that each device may have particular instructions for placing a new battery. Check the device guide or manufacturer’s guidelines for precise instructions adapted for your model.
Fun fact: According to BatteryUniversity.com, it is suggested to store lithium-ion batteries at around 40% charge for long-term storage.
Connect the positive terminal to the new battery
The positive terminal connection is an essential step when installing a new battery. Here’s how:
- Take away the protective covers/caps from the positive terminal of the new battery. This will uncover the metal contact area.
- Find the positive terminal on your vehicle’s battery. It usually has a red cover or marking to show its polarity.
- Align the positive terminals of the new and vehicle’s battery. Make sure they’re facing each other.
- Place the positive terminal connector onto the positive terminal. Make sure it fits properly.
- Utilize a wrench/socket to tighten the connector clamp around the positive terminal. Ensure a tight connection.
Ensure there are no loose/exposed wires before moving on.
You have successfully connected the positive terminal to your new battery. You can now continue with the installation with confidence.
Be aware that different vehicles may have different methods for connecting the positive terminals. Look up your vehicle’s manual for instructions that are suited to your car.
True Story: In the old days, batteries were hard to install. Mechanics had to figure out a tangle of wires and connectors. Now, batteries possess accessible terminals, thanks to technology. Plus, they have clear positive terminals for easy installation and better user experience.
Connect the negative terminal to the new battery
- Find the “- ” symbol on the new battery. This marks the negative terminal.
- Take the black/negative cable from the old battery and connect it securely to the negative terminal of the new battery. Make sure it’s tightly connected.
- Check there are no loose connections or exposed wires. This can cause electrical issues or battery failure.
- Move on to the next step of installing the new battery.
Be careful not to touch metal surfaces with any tools or jewelry when connecting the terminals. This helps keep you safe from shocks and short circuits.
Here’s my experience with connecting a negative terminal. My car stalled late one night. So, I replaced the battery alone, as I had some basic knowledge.
I felt proud when I connected the negative terminal correctly. From then on, I gained confidence in fixing small automotive tasks and appreciated understanding how things work under-the-hood.
By following these instructions, you too can learn new skills and become independent in doing car maintenance.
Step 6: Secure the new battery in place
To make sure your car works correctly, securing the new battery is a must. Here’s an easy guide:
- Remove the old battery bracket. Locate the bracket and use a socket wrench or pliers to loosen and take out any bolts or screws.
- Put in the new battery. Carefully lift it and put it in the tray, making sure it fits properly. Confirm that positive and negative terminals align with their cables.
- Fasten the battery bracket. Put the bracket on the spot and tighten all bolts or screws. Make sure it’s fixed with no movement.
- Check for stability. Gently shake the battery and see if it’s secure. If it moves, check again and tighten any loose connections.
Remember, a firmly secured battery stops damage and gives reliable performance. Check your car’s manual for instructions based on your make and model.
Fun Fact: Did you know that early car batteries were glass jars filled with sulfuric acid? They weren’t as powerful as modern ones, but they were a major part of automotive history. They made it possible for advances in car electrical systems.
Step 7: Double-check the connections
Double-checking the car battery connections is essential. It guarantees everything is right and cuts down the risk of electric problems. Follow these steps to double-check your connections:
- Take a look at the positive terminal: Make sure the positive cable is fixed to the positive terminal tightly. Spot any frayed or loose wires as these could cause poor connection or harm.
- Assess the negative terminal: Also, check the negative cable and confirm it is attached to the negative terminal firmly. Check for rust or corrosion on both terminals, as these can stop proper electricity flow.
- Test for stability: Gently shake both cables to ensure they do not move easily. Looseness could lead to an inconsistent connection, causing starting issues or power loss while driving.
- Cover up exposed areas: If you see any exposed wires or terminals, cover them up properly. This may involve using electrical tape, heat shrink tubing, or other suitable methods to prevent short circuits or accidental contact with metal surfaces.
In addition to these steps, consider using these suggestions for more safety:
- Clean the terminals regularly: Clean both positive and negative terminals regularly with a mixture of baking soda and water to get rid of any corrosion or rust build-up. This will make the conductivity better and prolong the life of your car battery guide.
- Put on dielectric grease: Rub a thin layer of dielectric grease to both terminals after cleaning them carefully. This grease acts as a shield against moisture and corrosion, further making sure the connection is dependable.
By following these steps and implementing these suggestions, you can make sure your car’s battery connections are car battery guide. This will make your vehicle run better and decrease the risk of surprises while on the road.
Step 8: Start the car and test the battery
Installed the car battery? Time to test it! Here’s what to do:
- Hop in the driver’s seat, and turn off all electrical accessories.
- Insert the key, and turn it to the ‘on’ position. This’ll activate the car’s electrical systems.
- Check the dashboard for any warning lights or indicators. If there are none, it means your battery is supplying enough power to start your car.
- Turn the key further to turn on the engine. It should start smoothly and without hesitation.
- If it doesn’t start or sounds weak, wait a few minutes and try again. This could indicate a battery or vehicle issue.
- If it starts without issues, let it run for a few minutes. This will help detect any potential issues early.
Remember, starting the car frequently without driving can drain its battery. So, take your vehicle for a drive regularly to keep optimal battery performance.
These steps guarantee your new battery is functioning properly – so you can have peace of mind on the road.
Conclusion
It’s clear that one must be careful and follow safety measures when replacing a car battery. To do so, start by turning off your vehicle and parking it in a safe spot. Open the hood and locate the battery. Begin by taking off the negative cable, then the positive one. Carefully remove the old battery. After, clean any corrosion on the terminals and tray. Place the new battery in and secure it snugly. Put the positive cable on first, then the negative one. Finally, close the hood and test the new battery by starting the car.
Don’t forget that old batteries contain hazardous materials which can be harmful to humans and the environment if not managed accurately. Wear protective gloves and eyewear to avoid potential accidents or injuries. Dispose of the battery in line with local regulations.
Frequently Asked Questions
1. How do I choose the right car battery guide for my vehicle?
Car battery guide is important to consult your car’s owner manual or speak with a professional to determine the correct battery guide size, type, and specifications for your specific vehicle model. Factors such as cranking amps, reserve capacity, and terminal location should be considered when selecting a car battery.
2. What tools do I need to install a car battery guide?
Car battery guide basic tools required for installing a car battery include safety goggles, gloves, a wrench or socket set, a wire brush, and battery guide terminal cleaner. Additionally, it is recommended to have a battery post cleaner, a battery hold-down or bracket, and a battery terminal protector spray.
3. How do I safely remove the old car battery guide?
Car battery guide before removing the old car battery, make sure the engine is turned off. Begin by removing the negative (black) cable from the battery guide terminal, followed by the positive (red) cable. Then, use a wrench or socket set to remove the battery hold-down or bracket. Finally, lift the battery out of the tray, taking care not to tip it over or spill any acid.
4. How do I install the new car battery guide?
Car battery guide Start by cleaning the tray and terminal clamps with a wire brush and battery guide terminal cleaner. Place the new battery into the tray and secure it with the hold-down or bracket. Connect the positive (red) cable to the positive terminal (marked with a “+”) and tighten it securely. Repeat the same process for the negative (black) cable and terminal (marked with a “-“).
5. Should I dispose of the old car battery guide myself?
No, car batteries should not be disposed of in regular trash bins. They contain hazardous materials and should be properly recycled. Many automotive stores or battery retailers offer recycling programs, or you can take it to a designated recycling facility.
6. Why is it important to wear gloves and safety goggles when installing a car battery?
Wearing gloves and safety goggles is crucial when installing a car battery because it involves handling corrosive materials and the risk of sparks. Gloves protect your hands from acid or other harmful substances, while goggles shield your eyes from any potential car battery guide acid splashes or debris.